
Easy Valentine’s Day Card Tutorial Using Brush Pens
If you’re looking for a handmade Valentine’s card that’s thoughtful, creative, and genuinely easy to make, this tutorial is for you. I’ll show you how to create a sweet Valentine’s Day card using brush pens, plus a really simple hack for making adorable little hearts with just the side of your nib.
This design is ideal if you’re short on time but still want something handmade and personal. Once you learn the heart technique, you can reuse it for birthdays, Galentine’s cards, Mother’s Day, or any occasion where you want to add a handmade touch.
Prefer to follow along visually?
This tutorial is also available as a step-by-step video on my YouTube channel, Blink Lettering, where you can watch the full process and see the brush pen heart hack in action.
👉 Watch the full video tutorial on YouTube
Supplies Needed for This Valentine’s Day Card
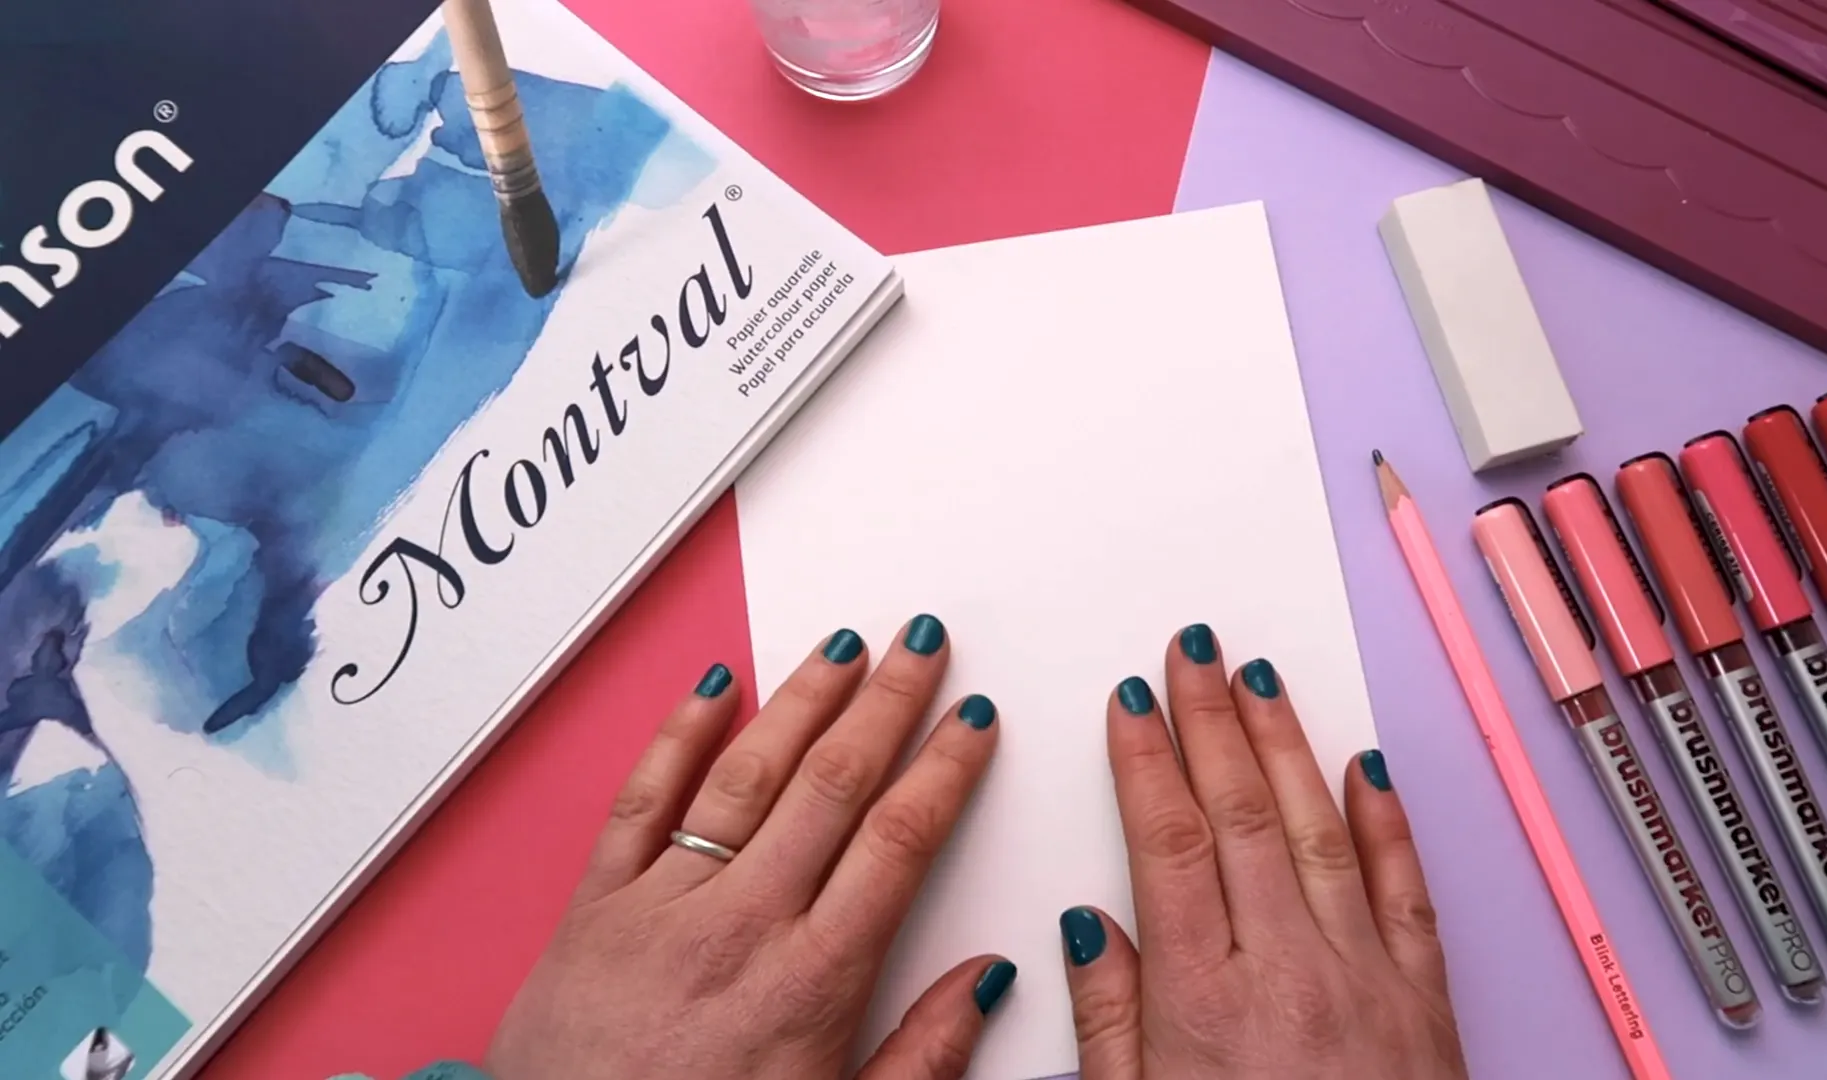
The materials needed to create this easy brush pen Valentine’s card
Before you start, gather the following materials:
Watercolour paper: I’m using Canson Montval 200gsm watercolour paper. The original pad size is 24 x 32 cm, trimmed down to A5 (14.8 x 21 cm).
Brush pens: A selection of pink Karin Brushmarker Pro pens for the hearts, plus a black brush pen for the calligraphy.
Pencil and rubber
Paper scoring tool or bone folder: I’m using the Crafter’s Companion Top Score Multi-Board.
A circular object: Anything round will work. This helps create a clean guide for the heart wreath.
Envelopes: Perfect for finishing the card and gifting. I’m using C6 Kraft Envelopes
How to Prepare an A6 Handmade Card
Trim your paper to A5 size. When folded in half, this creates a perfectly sized A6 greeting card.
To score the card:
Place the edge of the A5 paper against the “Half Fold A5” guide on your scoring board.
Score down the line to mark the centre fold.
Leave the card flat for now. We’ll add the design before folding.
How to Draw the Circle Guide for Your Design
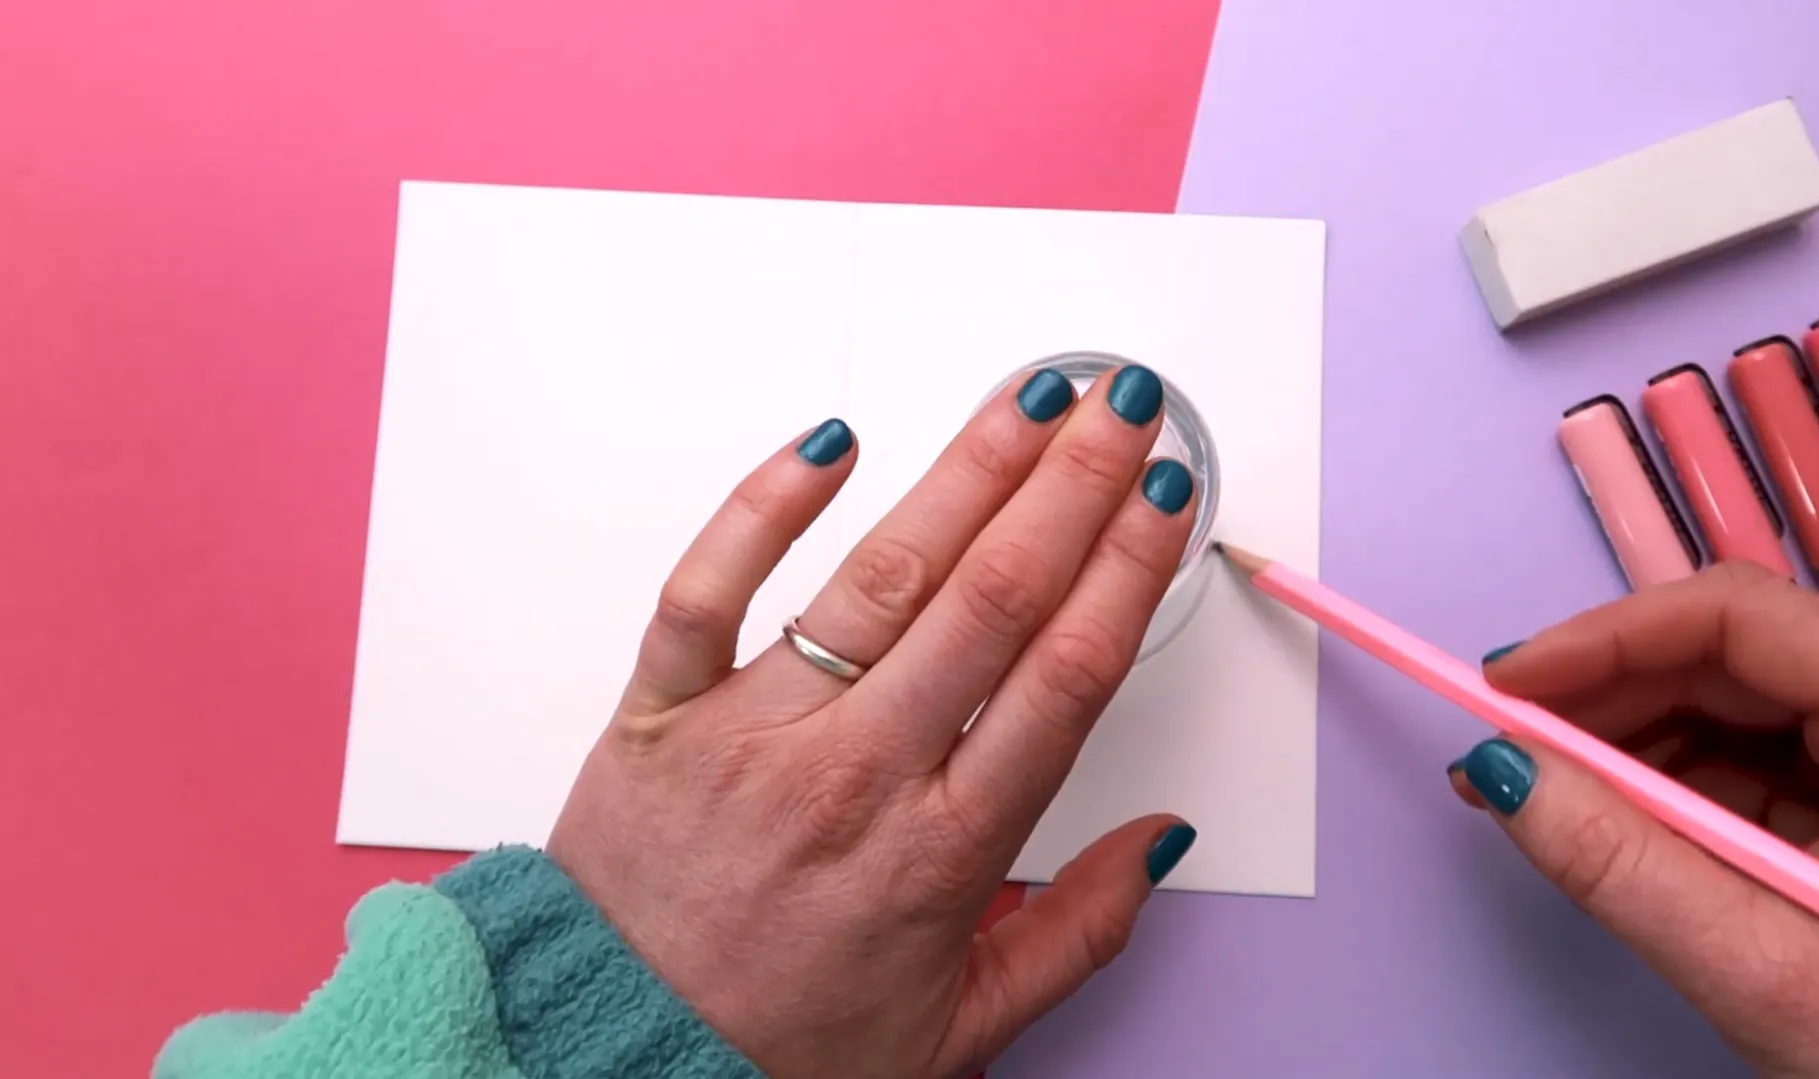
Lightly drawing a pencil circle to guide the heart wreath design.
The design will sit on the right-hand side of the card front.
Place your circular object in the centre of the card.
Look directly above the paper to check alignment.
Hold the object firmly and lightly trace around it with a pencil.
Keep the pencil line very faint so it’s easy to remove later.
Brush Pen Calligraphy for Valentine’s Cards
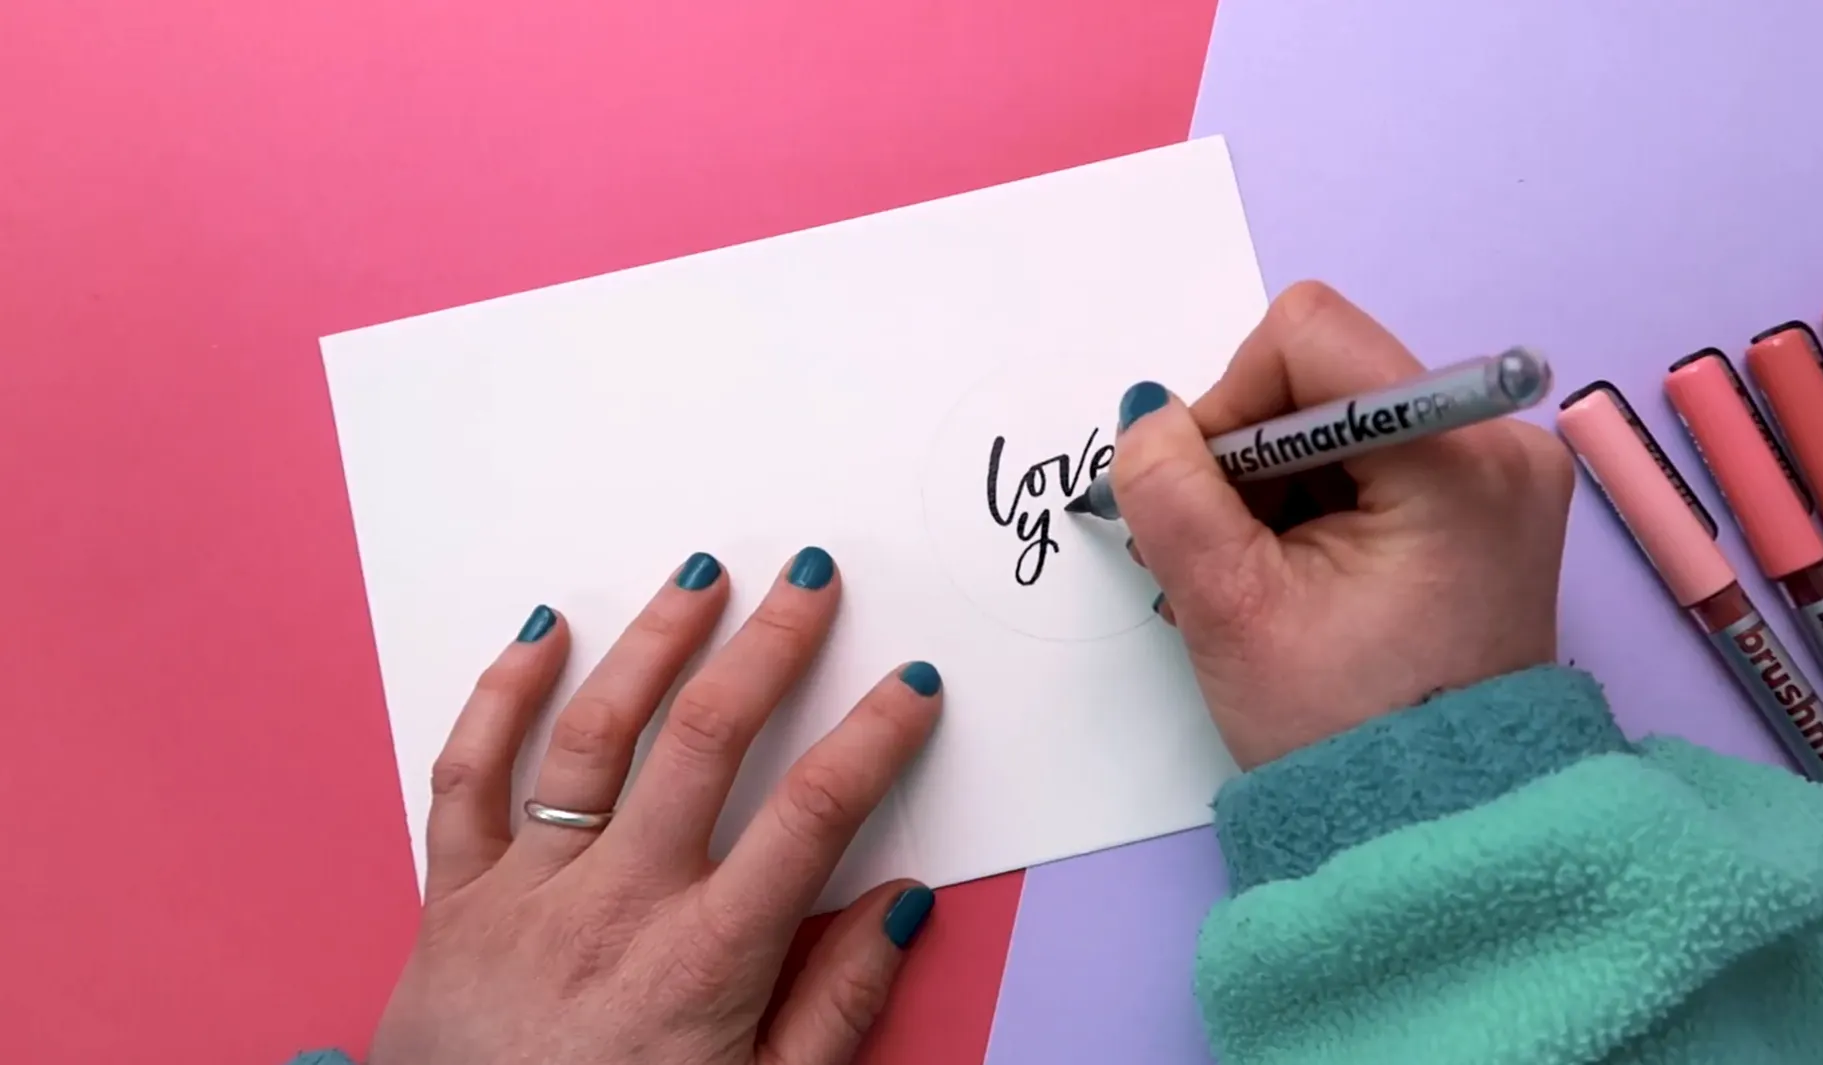
Adding brush pen calligraphy to the centre of the card on textured watercolour paper.
Inside the circle, lightly sketch your chosen wording in pencil. I’m using:
“Love you”
You can customise this however you like:
“I love you”
A Galentine’s message
A birthday greeting
A single word such as “Love”
Once you’re happy with the placement, go over the lettering using a black brush pen.
Brush pen tip for watercolour paper
Textured watercolour paper can fray brush pen nibs if you use too much pressure.
Apply gentle pressure on downstrokes for thicker lines
Use very light pressure on upstrokes for thin lines
Take your time and lift the pen between strokes to keep the lettering neat.
Easy Brush Pen Heart Hack (Beginner Friendly)
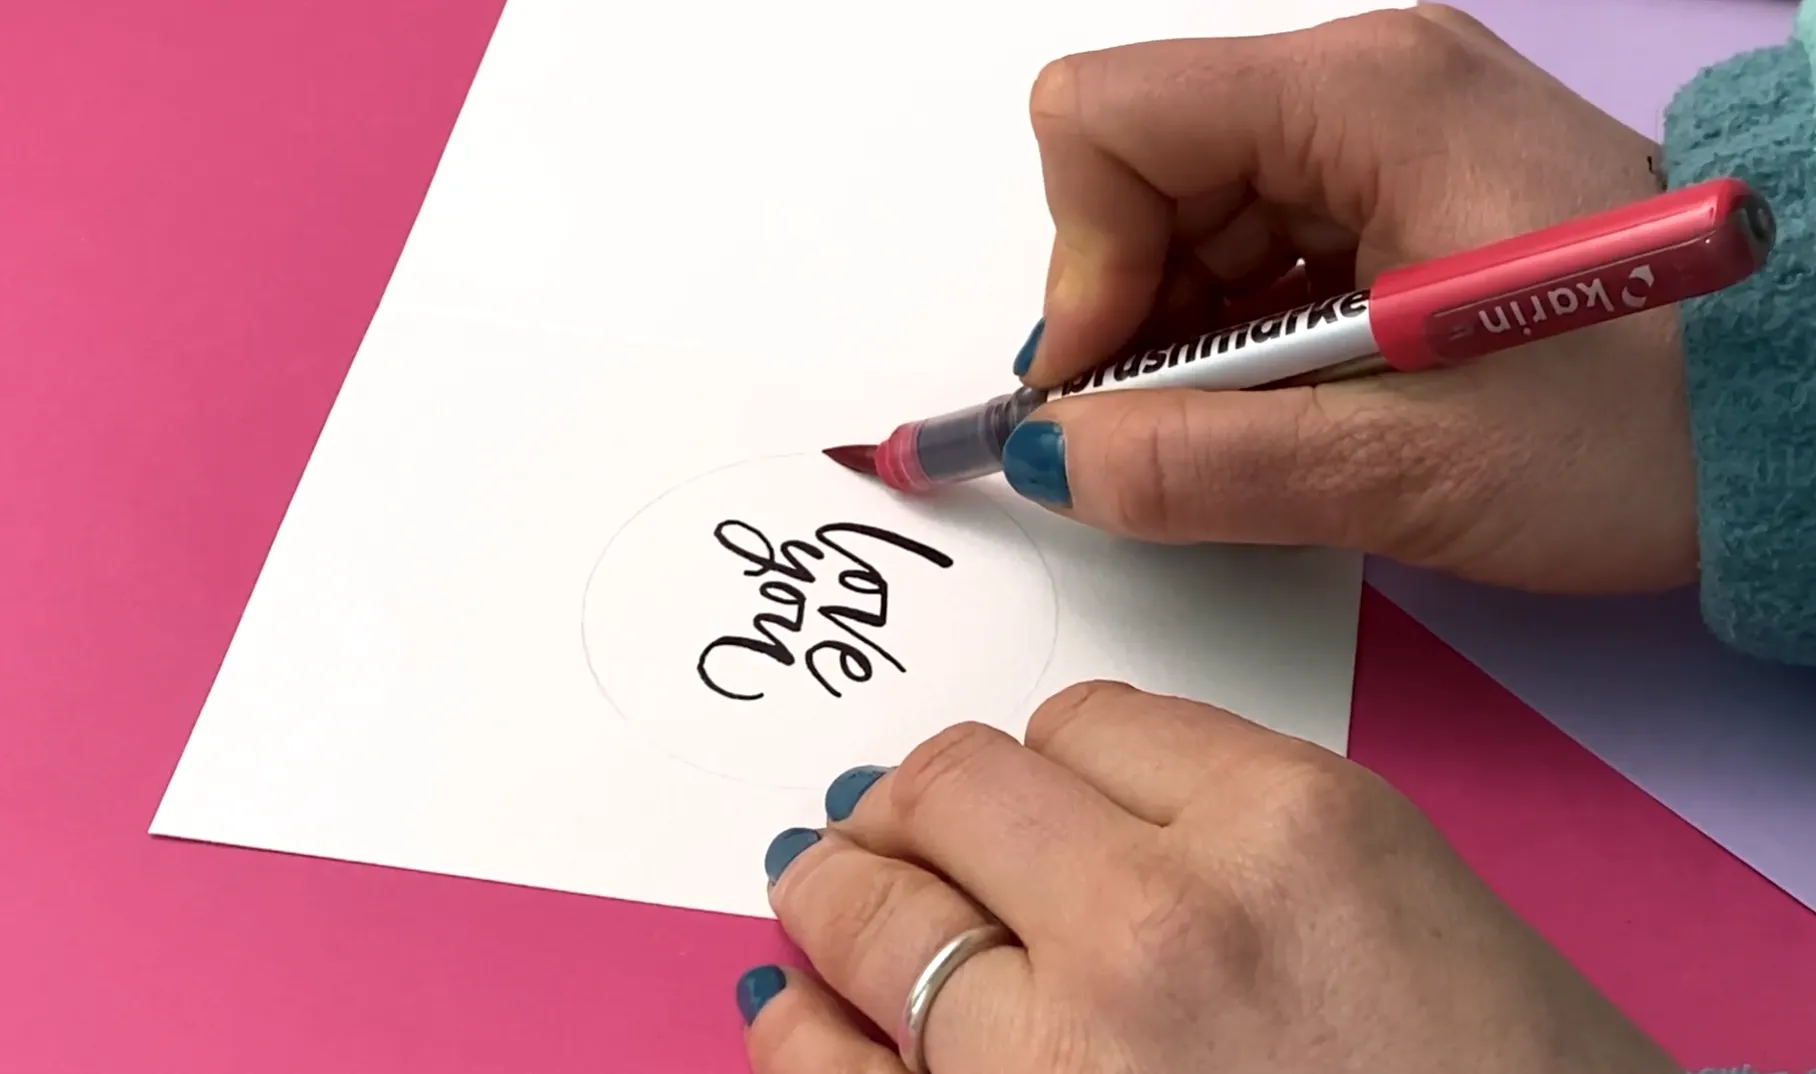
Creating the first stroke of a brush pen heart using the side of the nib
This is where the magic happens.
Turn your card upside down so the lettering is inverted.
Choose a pink brush pen.
Press the side of the nib onto the paper along the pencil circle, then lift up to create a teardrop shape.
Move the pen slightly to the right.
Place the tip at the point of the teardrop, press down, and lift.
You’ve just created a heart using a brush pen.
Creating a Heart Wreath with Brush Pens
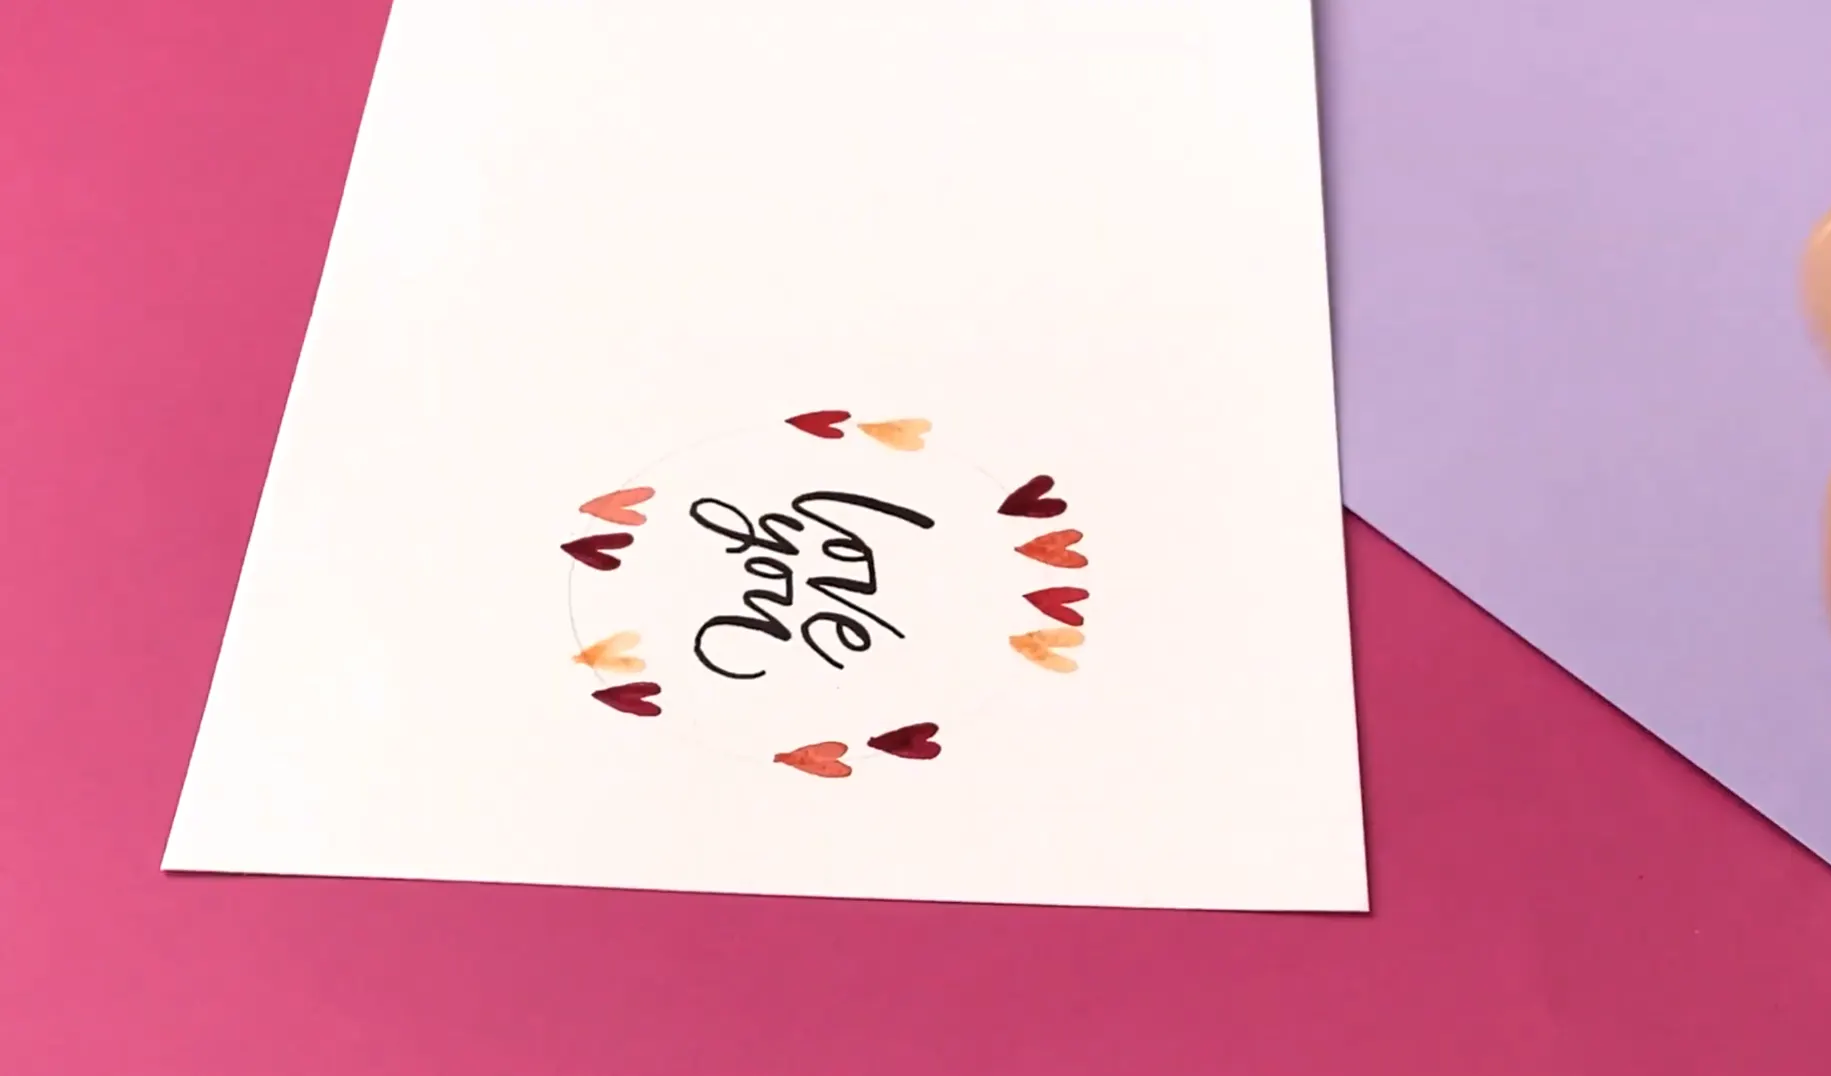
Building up a heart wreath using different pink brush pen shades
Repeat the heart motion around the pencil circle to form a wreath.
Use multiple pink shades to add depth.
Allow some hearts to gently bleed into each other for a soft watercolour effect.
Alternate colours neatly or place them more organically. Both styles work beautifully.
If the centre feels a little empty, you can adjust the wording. I added an “I” so the phrase reads “I love you”, which balanced the design nicely.
Drying, Erasing Pencil Lines, and Folding the Card
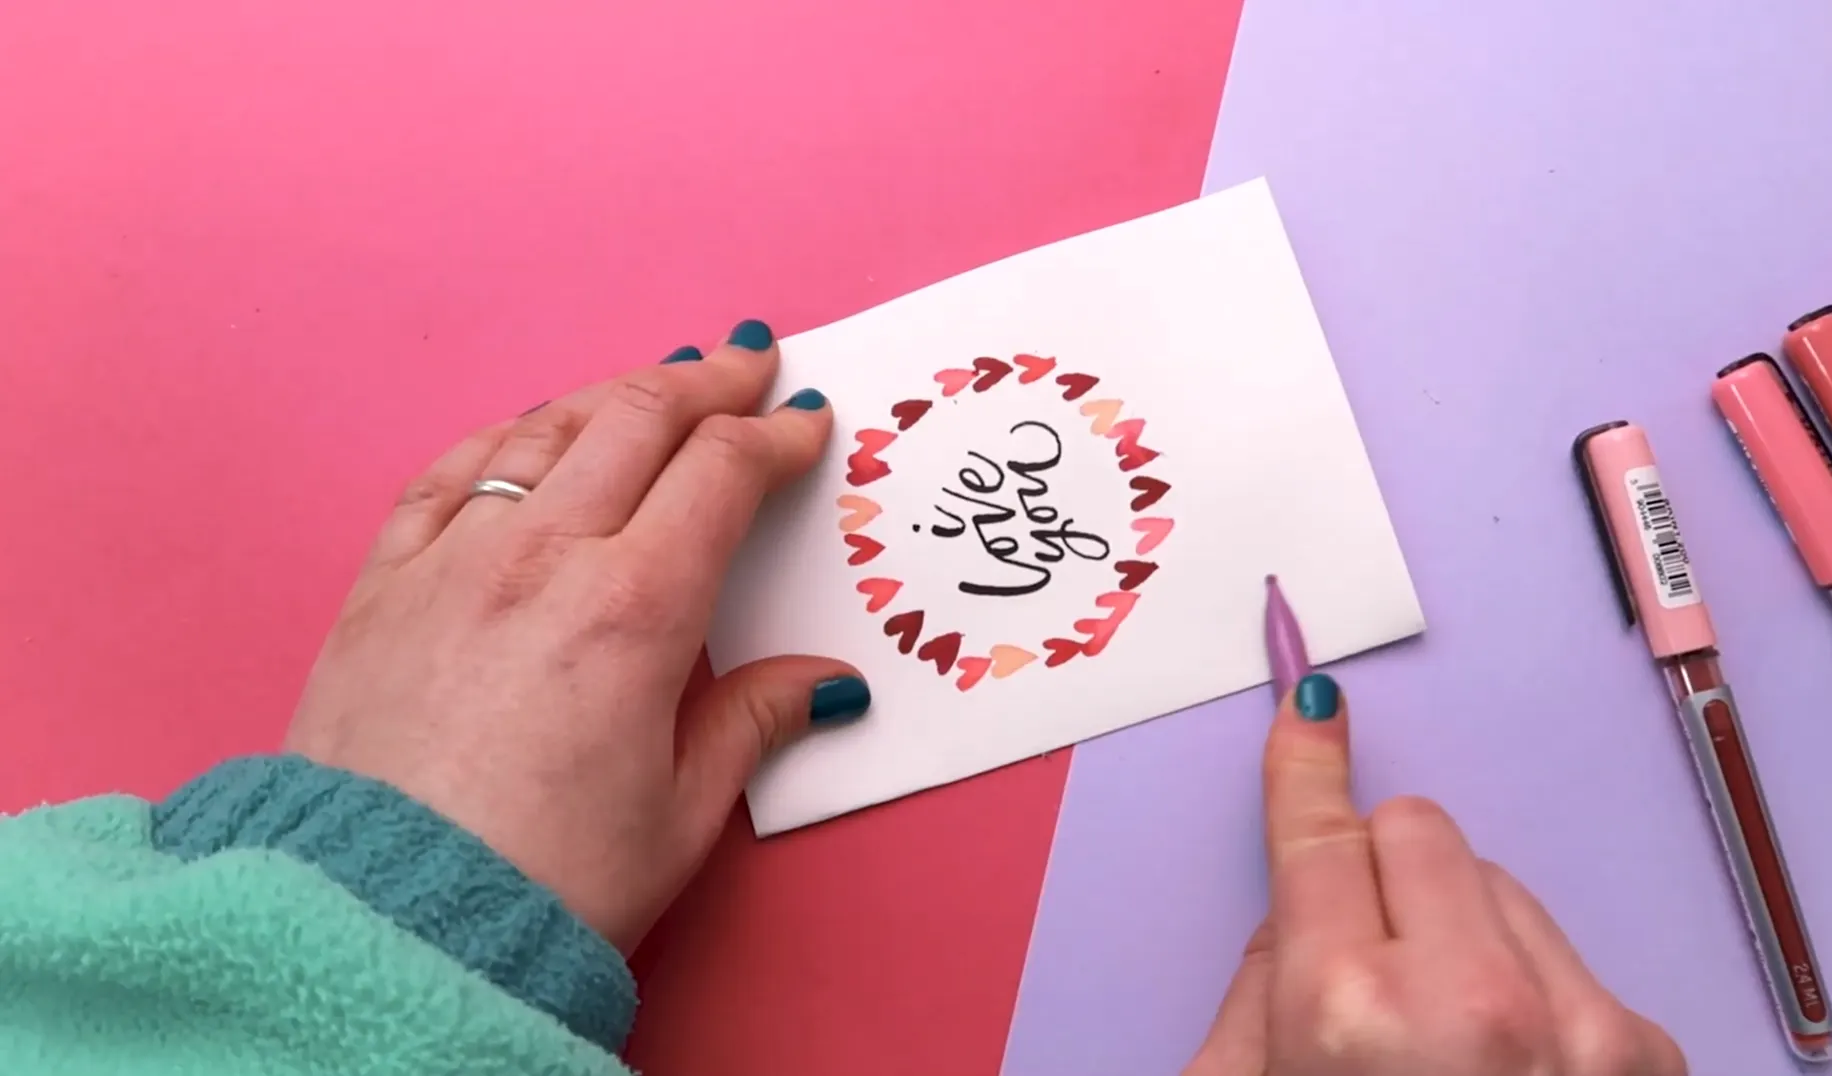
Folding the card neatly along the scored line using a bone folder
Let the card dry fully before moving on.
If you’re short on time, you can use:
A heat gun
A hairdryer
Be aware that heat can slightly warp watercolour paper. If needed, place the card under a heavy book once dry.
To finish:
Gently rub out all pencil marks.
Fold along the scored line.
Use a bone folder or scoring tool to create a crisp, professional fold.
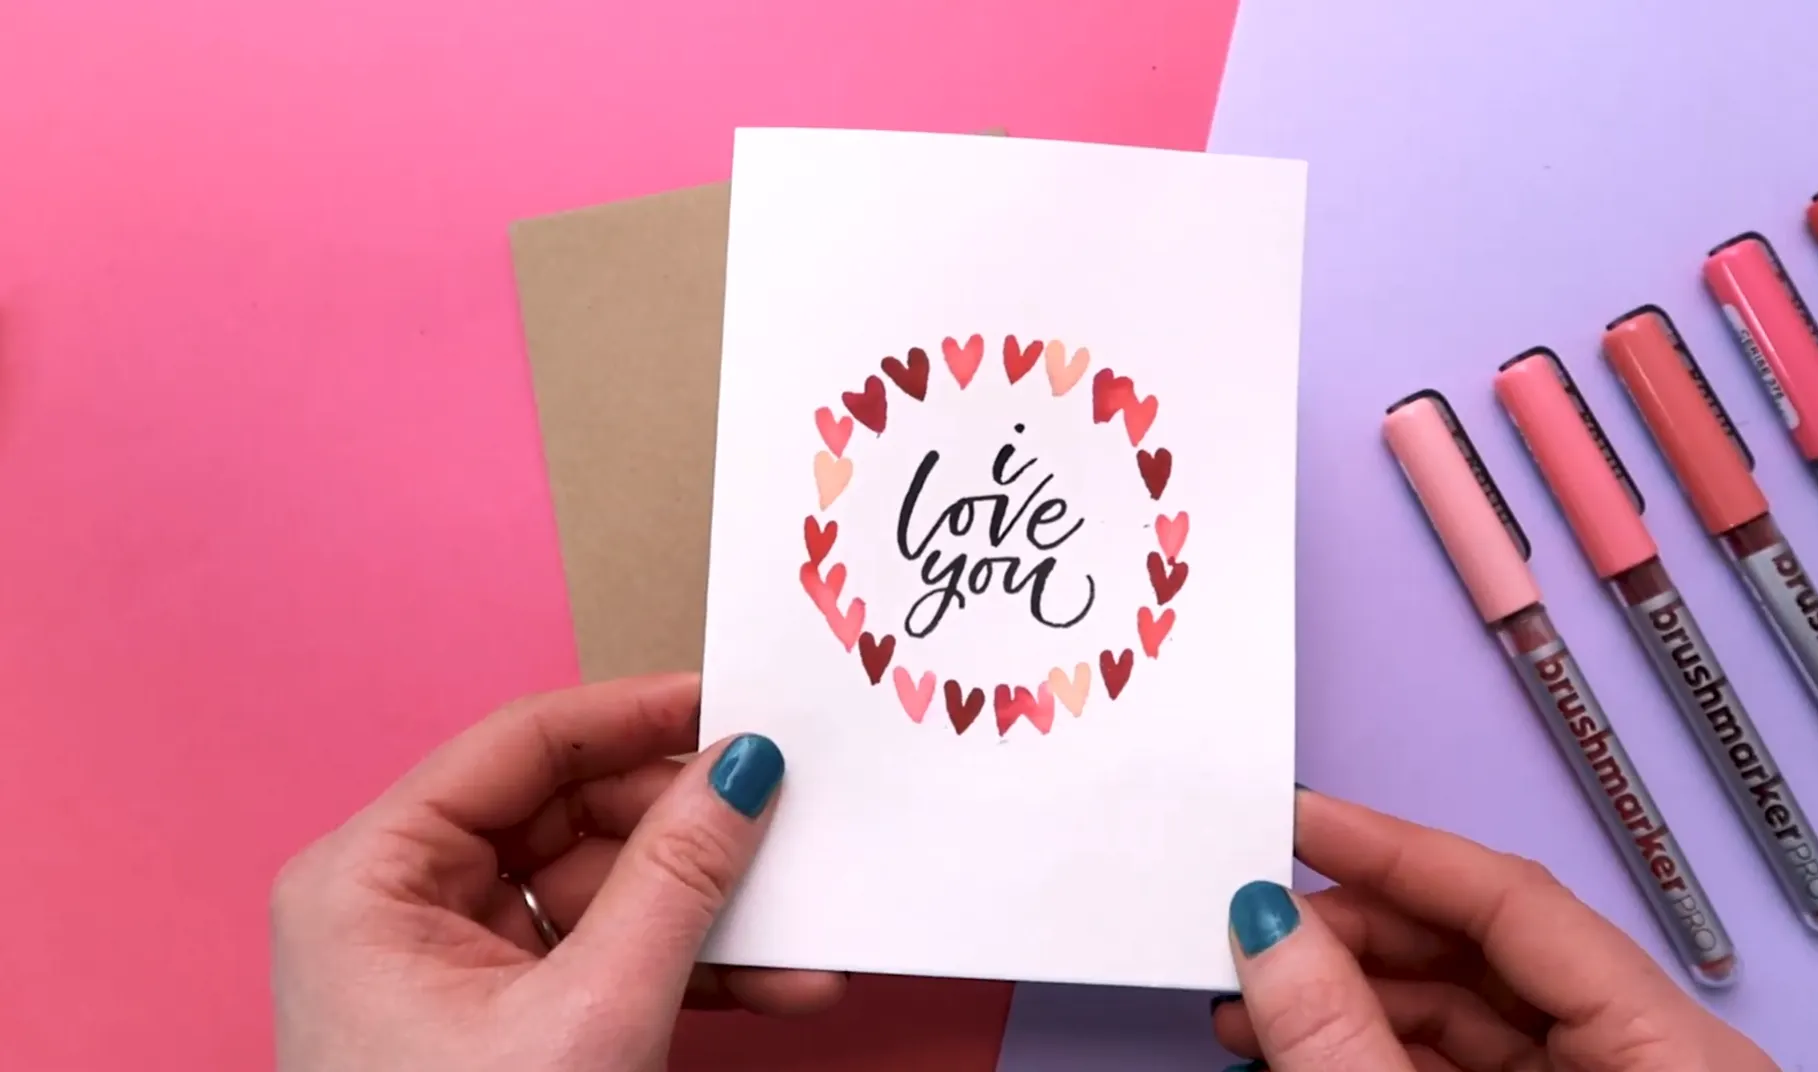
Finished Handmade Valentine’s Card
Completing a simple brush pen heart with a second stroke
You now have a simple, handmade Valentine’s Day card featuring a brush pen heart wreath and modern calligraphy. Add a personal message inside, pop it into an envelope, and it’s ready to gift.
This heart technique works with many brush pens, not just Karin Brushmarker Pros. Pens with slightly larger nibs, such as Tombow Dual Brush Pens or Ecoline Brush Pens, also work really well.
If you give this tutorial a go, I’d love to see your creations. Tag me on Instagram @blinklettering so I can share your work.
And for more lettering tutorials, brush pen techniques, and creative inspiration, make sure you’re subscribed to my YouTube channel, Blink Lettering.
Materials Mentioned in the Video
Brush Pens
Paper & Tools
Connect With Me
Some links in this post may be affiliate links. This means I may earn a small commission if you choose to purchase, at no extra cost to you. This helps support Blink Lettering and the free tutorials I share.