
How to vectorise procreate lettering
In this tutorial I take you through how to vectorise your Procreate lettering all on your iPad and for FREE! You will need Adobe Capture and Vectornator, but these are totally free to download!
Before we jump in… There are links in this blog post that are affiliate links. This means when your purchase through these links I receive a small commission, this helps me continue creating free content like that for you. It doesn’t cost you anything extra. And don’t worry… I wouldn’t suggest products to you unless I like them!
Products mentioned
Fancy watching my YouTube video instead of reading?
PIXELS VS VECTORS
Rasterize images are made up of pixels, where as vectors uses points to create shapes. If you increase the size of a rasterised image it will become blurry or pixelated, this is because you aren’t increasing the amount of pixels there are just how big they are. Vectors are completely scalable though, you could take a vector image and make it as big as the Eiffel Tower and it still wouldn’t become pixelated!
So why would we want to convert our Procreate lettering in to vectors? Procreate only works in pixels, you can’t create vectors in Procreate. If you are looking to create fonts, logos or cut files for a Cricut or Silhouette, you will need to convert your lettering in to a vector format. This will make the file completely scalable.

STEP 1. OPEN PROCREATE AND EXPORT
I already have some artwork ready for this tutorial, but have some fun playing with different brushes to create your lettering. Once you are happy with your lettering, export it out as a PNG. PNG files have a transparent background, so the white won’t be visible. This is important when saving out your file.

STEP 2. OPEN IN ADOBE CAPTURE
If you already have Adobe Capture on your iPad you should be able to open your PNG in Adobe Capture directly from the Procreate App. Adobe Capture is free to download. It’s also free to set up an account, you don’t need to pay for an Adobe Creative licence to use it!
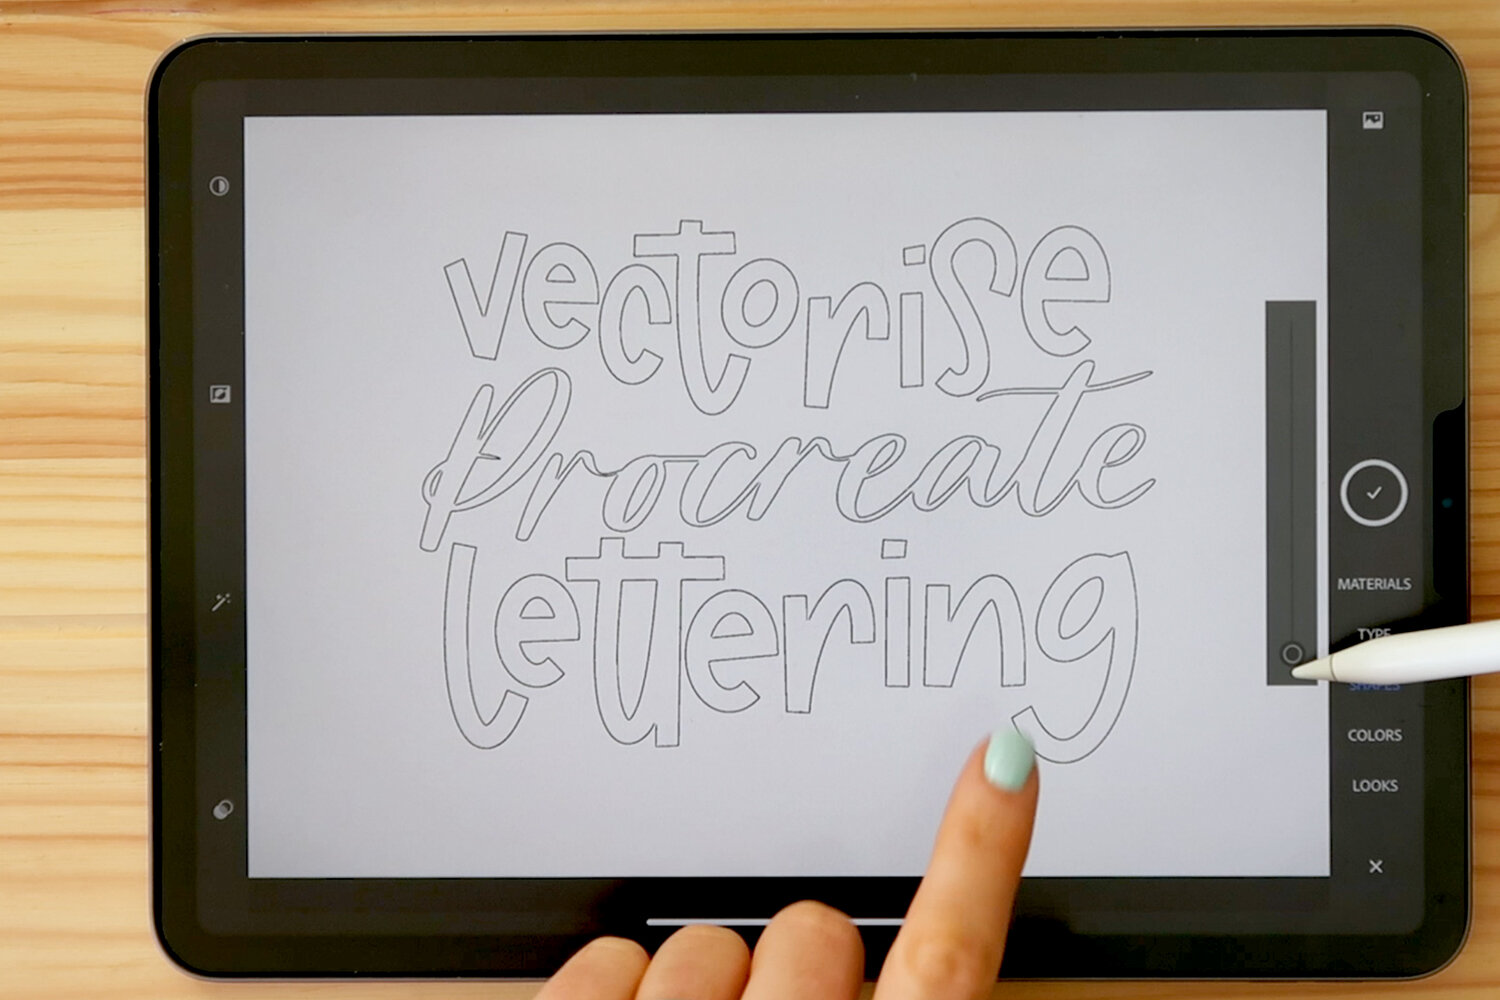

STEP 3. ADJUSTING THE THRESHOLD
After the file opens in Adobe Capture you will see the sliding toolbar on the right hand side. This changes the threshold, so effectively changes how much of the image Adobe Capture scans to convert in to a vector format. If you have it at the bottom end, only the outline is picked up. Move it up slightly and you can see the lettering is slightly patchy. It’s best to slide it towards the top to ensure all aspects of your lettering are captured. Once you are happy, click on the tick button.

STEP 5. REFINE AND SMOOTH
After you tap on the tick button you will be taken to an area where you can refine and smooth your lettering. I tend to ignore refine, as we will be doing this later on in Vectornator. If you tap on Smooth, you will see that you have an option to turn it off and on.
When you toggle the smooth button you can see that the edges of your lettering become less bumpy and more refined.
The smooth tool works for blocky lettering, however if you have calligraphy style lettering like I have, you can see the smooth tool drastically changes it and it doesn't look good! So I tend to leave it off.
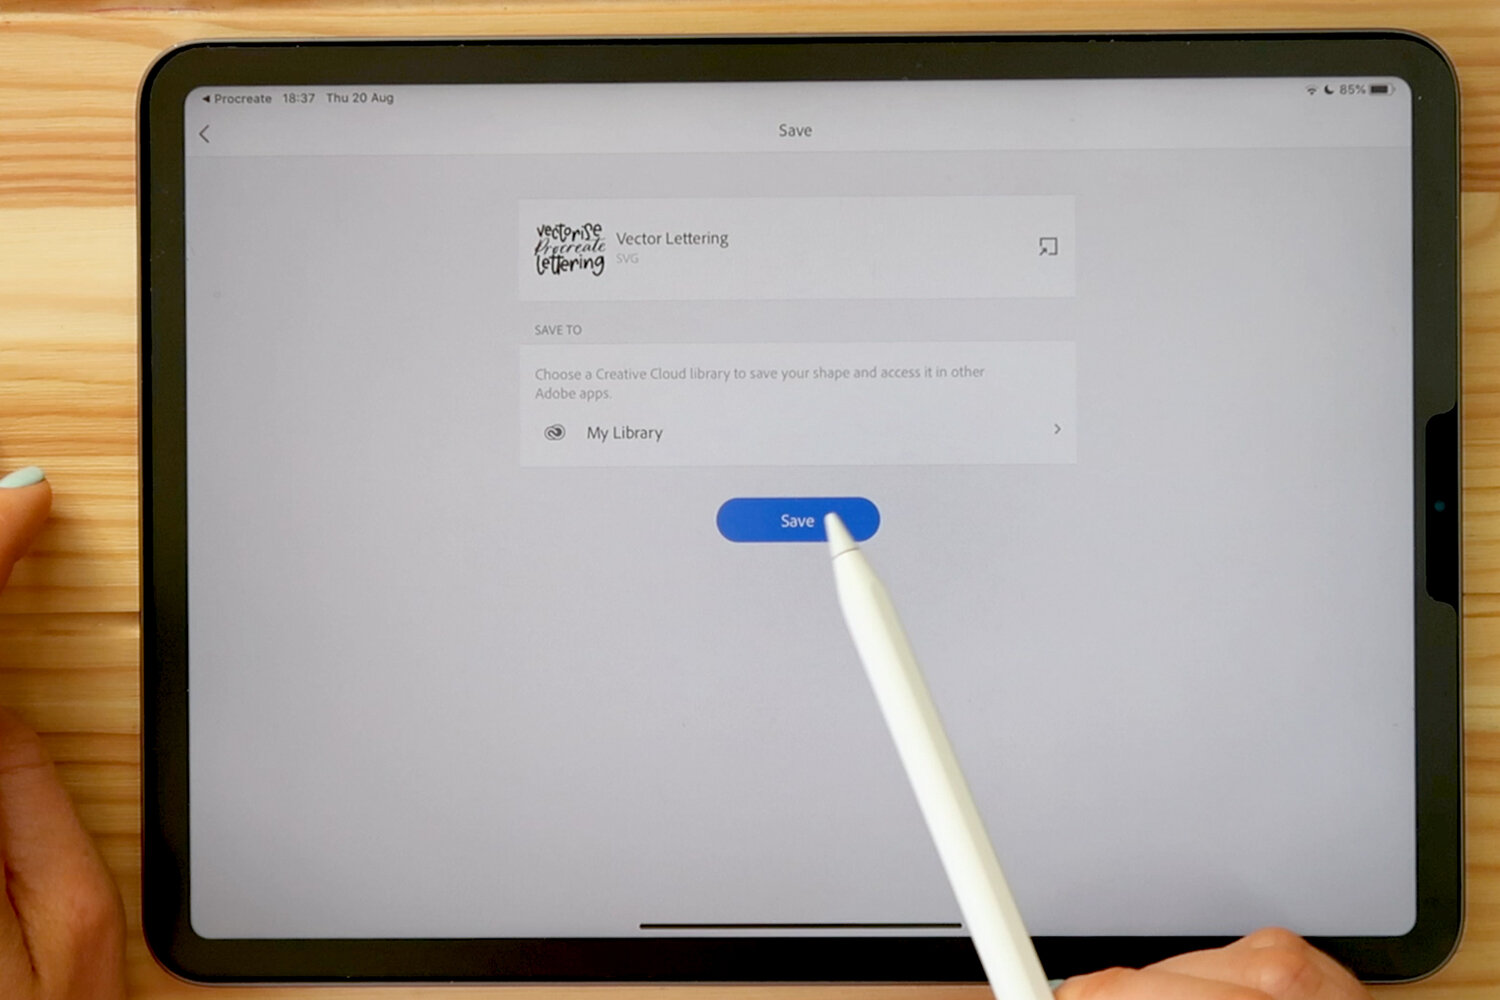
STEP 6. SAVE AS SVG
Once you are happy with the file, tap save and save on to your iPad or iCloud. You will see that it saves the file as an SVG instead of a PNG. SVGs are universal vector files, where as a PNG only works in pixels.

STEP 7. OPEN SVG IN VECTORNATOR
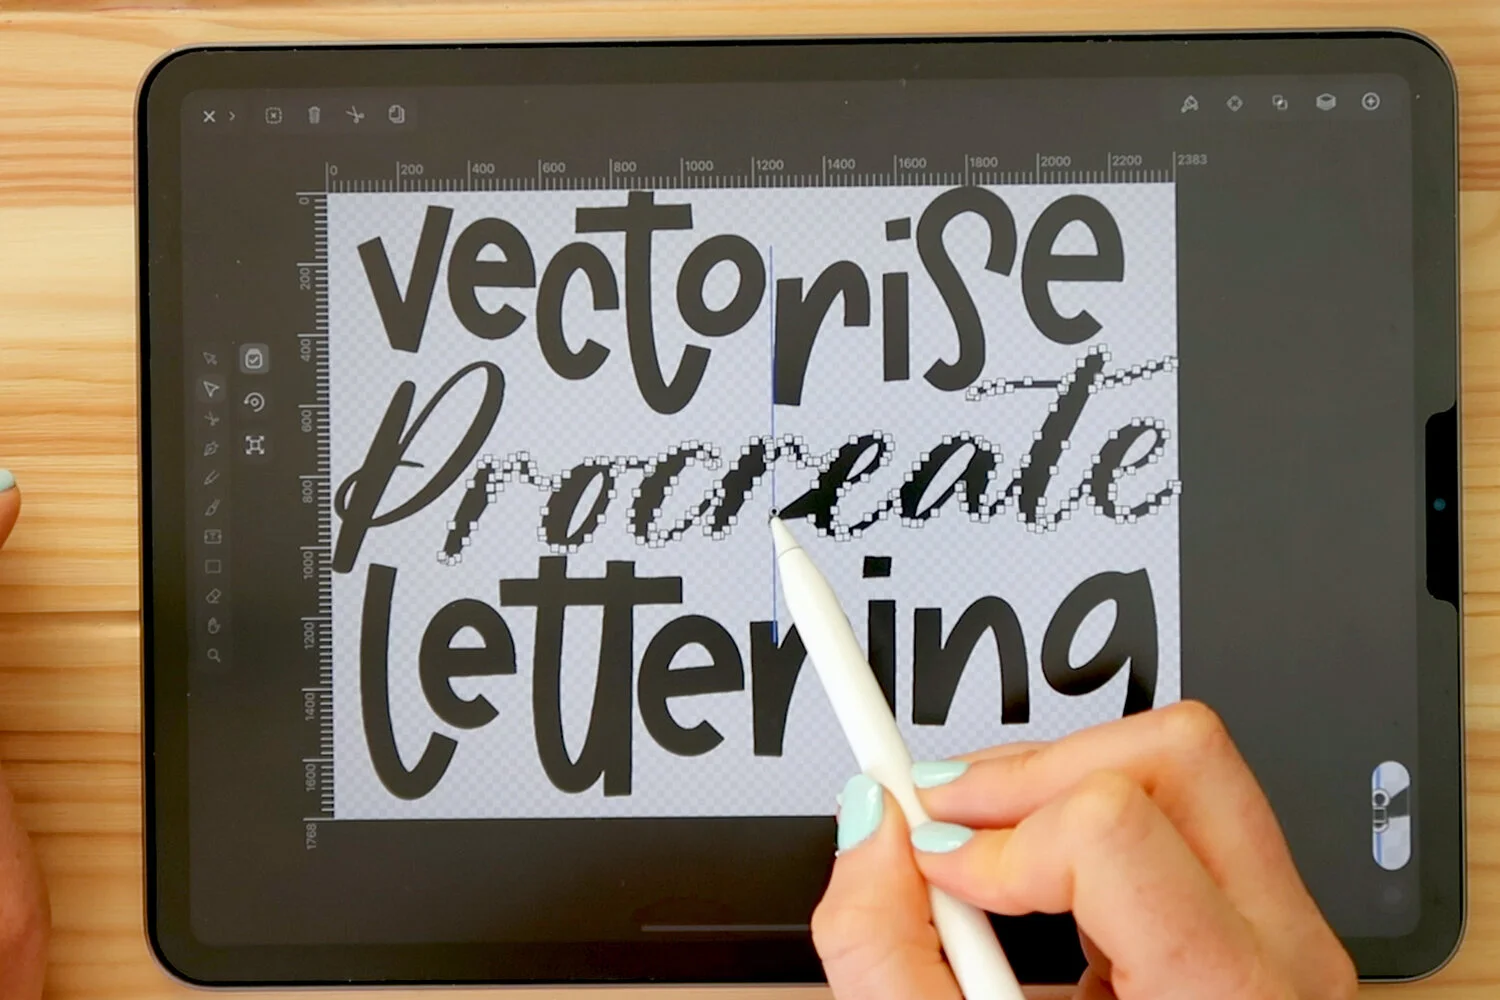
Vectornator is a completely free app to download. It is a vector based app, and works in a similar way to Illustrator. Once you have downloaded open it up and load your save SVG lettering file.
STEP 8. ADJUSTING YOUR LETTERING
Now your lettering is a vector, it has been broken out in to shapes. If you tap the Selection tool, which is at the top of the left tool bar, you can then tap on any letter and move it around freely. If you have letters that are connected, these will be seen as one shape, so will move around together.

If you look closely at the lettering you will see slightly dips and bumps that don’t look quite right. That’s okay though, because we can edit this in Vectornator! Tap on the Direct Selection tool, which below the Selection tool, then tap on the edge of the lettering you want to edit. You will see that lots of squares show up all around the lettering, these are anchor points and each one can be moved individually!
Tap on the point you would like to move and then move it around. You will see there are circles either side of the anchor point, these change the curve of the point.

You can change how the curves act by tapping on the Paint Brush tool in the top right and then tapping on the different anchor point options. Have a little experiment to see what each one does (I go through this in more detail in the video)

STEP 9. EXPORT YOUR FILE
Once you are happy with your lettering it’s time to export out your file. Tap the arrow in the top left and then the export button. Here you will see various options for saving your file. Do not save it as a JPG or a PNG, these are pixel based formats only, so you will lose the anchor points and if you wish to resize the image later on it can become pixelated. The best format to save it is a SVG file, this is a universal vector format. If you have Adobe Illustrator, you could save it as an AI file, and then open it up in Illustrator.

TIPS
If you want to have colourful lettering, it’s best to do this at the vector stage. Adobe Capture will convert all images to black, so there is no point in colouring your letters in Procreate if you are going to vectorising them. In Vectornator you can change the colour of each letter (or shape) individual. Tap on the Selection tool and then the letter you would like to colour, then tap the Paint Brush tool and here you can select a colour.