
Looking for a fun and creative DIY craft project that you don't need any calligraphy experience for?
In this tutorial, I'm going to take you through how to create this beautiful watercolour calligraphy print. It's bright, colourful and really fun to make, and the best part is that you don't need any calligraphy experience to give it a go! Simple Watercolour Calligraphy …
So let's dive right into the tutorial and get started.
If you’d prefer to follow along visually, you can watch the full step-by-step tutorial here:
👉 Watch on YouTube
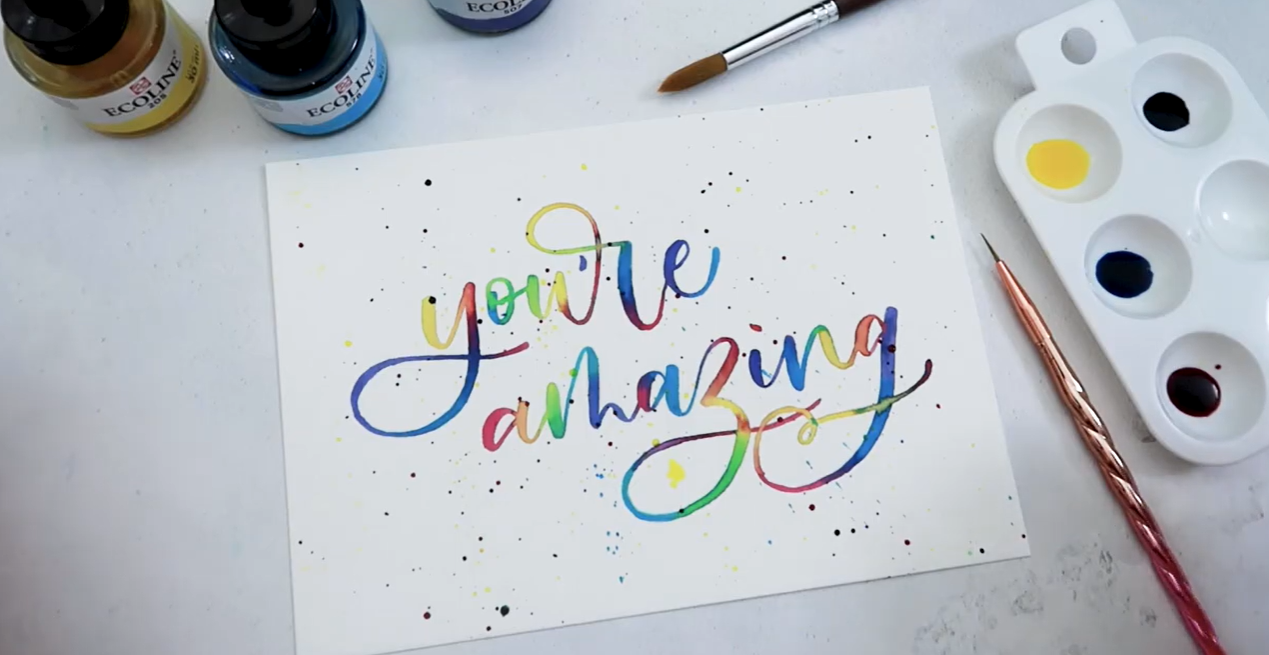
Finished watercolour calligraphy
What you'll need
Before we dive in and start creating our beautiful blended watercolour calligraphy print, let's take a look at the tools I'll be using.
For the watercolours, I'm using Royal Talens Ecoline liquid watercolours. I absolutely love these for blending because they're already liquid, so you don't have to worry about dipping your paintbrush in water and loosening up a watercolour palette. They're also really bright. Simple Watercolour Calligraphy …
For this tutorial, I'm using:
Yellow
Purple
Blue
Pink
A small watercolour palette
A pot of water
A fine-tipped paintbrush
A paint rag
Watercolour paper
Your printed calligraphy design
I'm using a Royal Langnickel Unicorn brush. Yes, it is cool and very pretty, but it's also a really good brush. It has quite a fine tip, which is perfect for this project because we've got some thicker places and thinner places, so it's much easier to add the detail. Simple Watercolour Calligraphy …
I also have my trusty paint rag to wipe off any excess colour.
For my print, I'm using Daler-Rowney watercolour paper, which I believe is called the Langton. It came from an A2 sheet and I've trimmed it down to A5. Simple Watercolour Calligraphy …
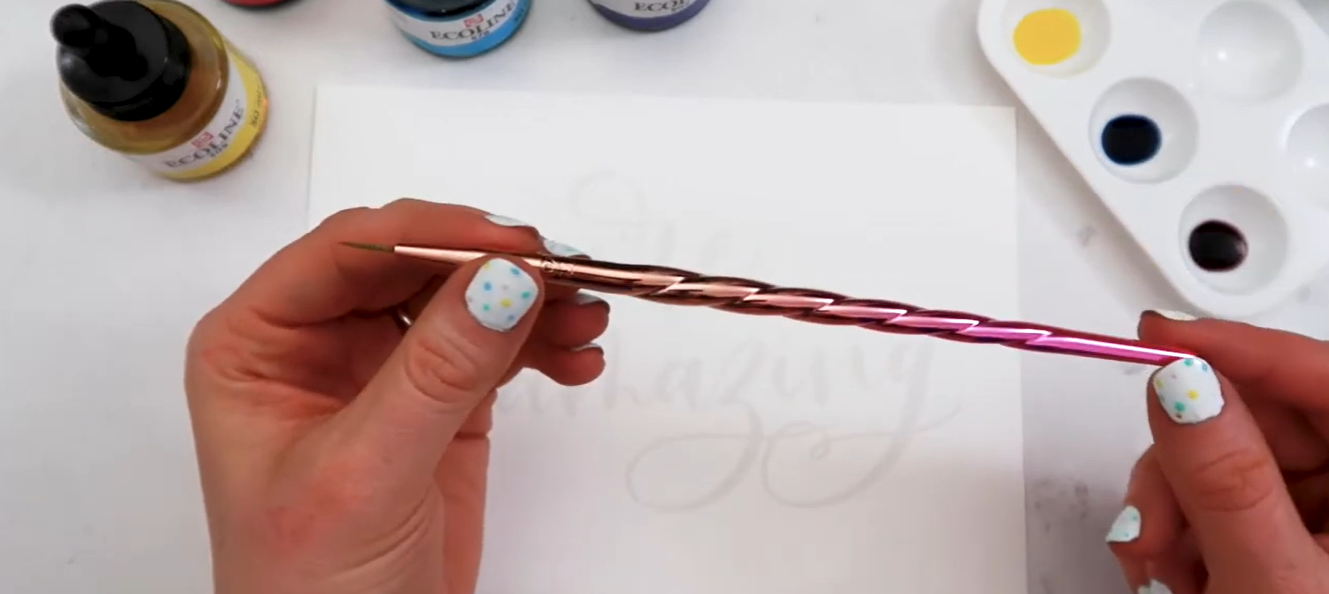
Watercolour calligraphy supplies
Don't have an iPad or a printer?
Don't worry!
I created my calligraphy design in Procreate on my iPad and then sent it to my printer to print. However, if you don't have an iPad to create your own calligraphy, or you don't have a printer, you can use a really light grey pen instead.
The Kuretake ZIG Clean Colour Real Brush Pen is a really good pen for doing a light grey outline of your calligraphy or lettering. You can then go over the top with your watercolours. Simple Watercolour Calligraphy …
Just make sure you don't use a grey that's too dark, as you may find that you lose some of the brightness with your watercolours as they mix with the ink. Simple Watercolour Calligraphy …
I've also created a printable version of the design, so you can print it at home and follow along with the tutorial. Simple Watercolour Calligraphy …
Let's get started
The key here is to take your time.
You'll see that I keep going over sections just to make sure there's enough watercolour on there. When you're ready to move on to another colour, dip your brush back in the water and clean it off with your cloth. Simple Watercolour Calligraphy …
For my first blend, I'm going for pink and yellow because I think they blend really nicely together.
Before going near the yellow, I add some pink first so the colours don't mix quite yet and it's still nice and bold. Then I gently go into where the yellow is and pull the yellow through so the colours blend a little bit nicer. Simple Watercolour Calligraphy …
Don't worry about going outside the lines
You don't need to worry if you go out of the lines a little bit.
It's meant to look handmade after all! Simple Watercolour Calligraphy …
Next, I'm going in with blue and then purple. When you're working around joins and overlaps, you can start the new colour slightly away from the previous one and then blend the colours together.
And don't be afraid to turn the paper around to get a more comfortable position. Just make sure you don't smudge any work that you've already done. Simple Watercolour Calligraphy …
How to blend the watercolours
One of my favourite parts of this technique is seeing all of the colours blend together.
Sometimes it's worth just blending parts of it without actually using any ink, just to get a smooth transition. Simple Watercolour Calligraphy …
When I'm blending, I like to use very short strokes. I'm not staying on the page too long, and that's just because I have a little bit more control over it.
This is why we use the guides. Rather than doing the calligraphy all in one go, we're filling it in. It's kind of like colouring in, in a way. Simple Watercolour Calligraphy …
If you go out of the line a little bit, that's okay. It's handmade!
You'll start to see the magic happen as the colours mix. For example, when the yellow goes into the blue, it creates a lovely greeny colour. Simple Watercolour Calligraphy …
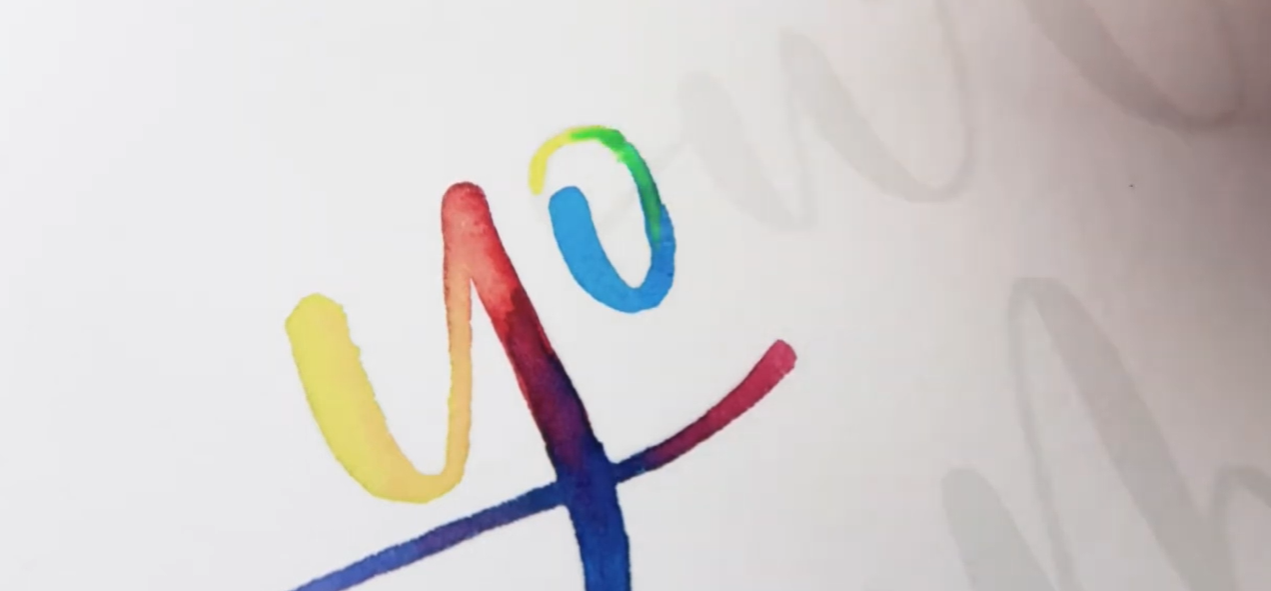
Watercolour calligraphy blending
Have a play with your colour combinations
It's important to think about what colours blend into each other when you're doing this.
Some combinations work better than others. For example, purple and yellow can clash together a little bit and don't always make the nicest blend. It's worth having a little play with your colours and seeing what works best for you. Simple Watercolour Calligraphy …
I personally didn't really like that particular colour, so I added a bit of pink to blend it out more. It creates more of a sunset blend.
You might also find that when the lines are really thin, it's worth just going slowly but in one stroke. See what feels comfortable to you. Simple Watercolour Calligraphy …
Blending overlapping flourishes
When you get to the flourishes and overlapping sections, you might find that some of your paint has already dried.
If that happens, you can use a little bit of water to bring it back to life.
Dip just the tip of your paintbrush into the water and lightly go over the dried colour. The water will reactivate the paint and help it blend more nicely. Simple Watercolour Calligraphy …
One thing I like to do here is make the colours look like they're looping around each other rather than blending into exactly the same area.
We want it to look like the colours are kind of dancing with each other. Simple Watercolour Calligraphy …
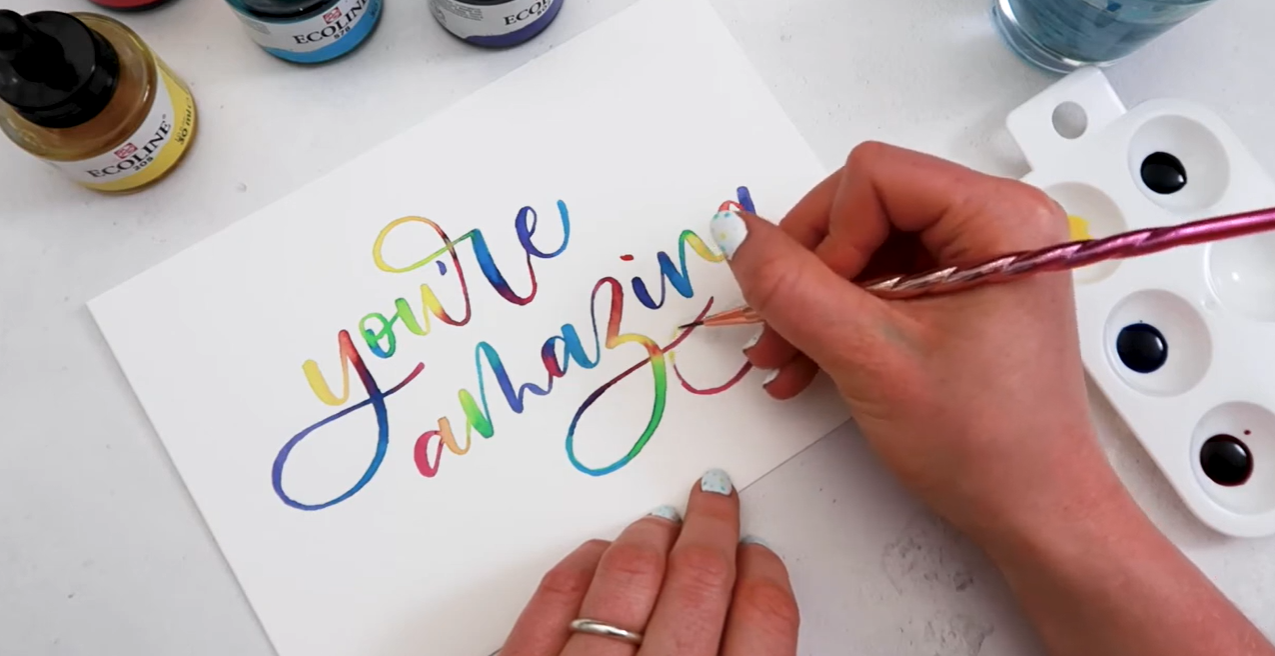
Reactivating watercolour paint
Keep your colour placement random
Once you've finished the calligraphy, you can see just how bright and colourful it is.
I've done the blending randomly throughout all the letters, but you could change the colour each time you do a new letter. That would create a completely different style. Simple Watercolour Calligraphy …
I personally like this random style of blending, and I'm also not using the colours in the same order every time.
I'm not always going yellow, pink, blue, purple. I'm mixing it up to give the piece a little bit of depth. Simple Watercolour Calligraphy …
Add some colourful paint splatters
Now it's time to have a little bit of fun!
We're going to add some paint splatters to the artwork.
Before you do this, get a scrap piece of paper to protect your workspace. For the splatters, I'm using a slightly bigger paintbrush with a bigger, bristly end. This is perfect for flicking the watercolour paint all over. Simple Watercolour Calligraphy …
Start with a lighter colour, such as yellow.
Position your hand over the paper without touching it, and gently hit the paintbrush to create the splats.
Just be warned, it is quite messy! I recommend putting down plenty of scrap paper if you're precious about your table. Luckily, because these paints are water-based, they're quite easy to wipe up if you clean them straight away. Simple Watercolour Calligraphy …
You can then repeat this with your other colours.
I find this method gives me a little bit more control over where the paint goes. Simple Watercolour Calligraphy …
And there you go!
A super easy, beautiful watercolour calligraphy print that's bright and colourful. Simple Watercolour Calligraphy …
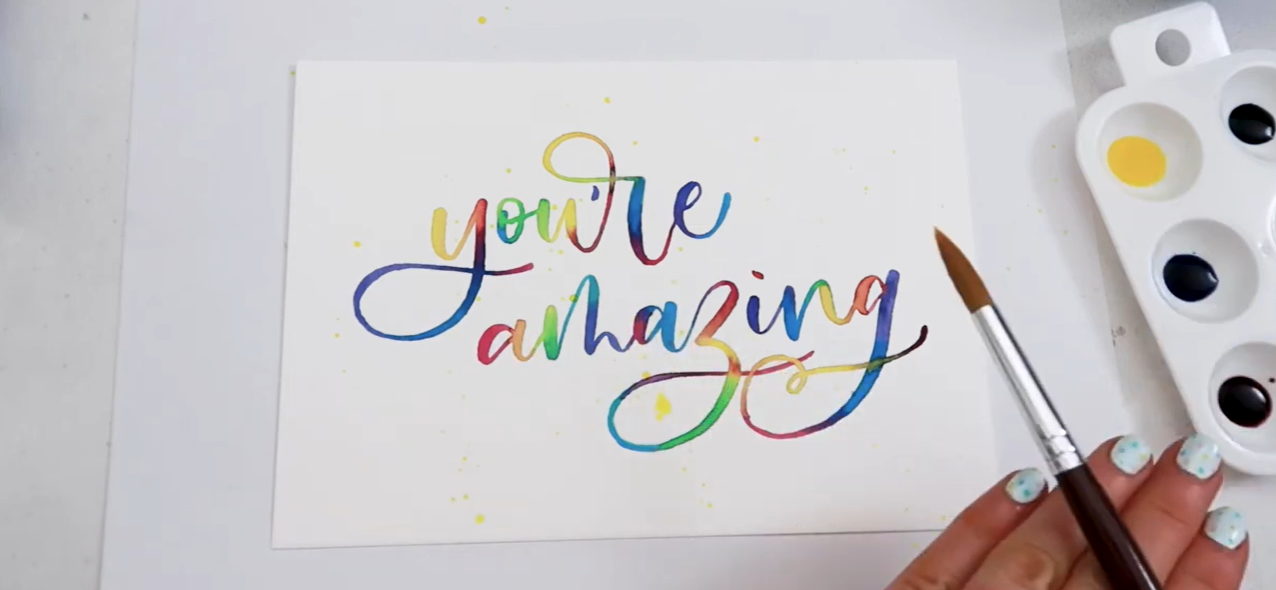
Watercolour calligraphy paint splatters
Create a colour swatch palette
If you're struggling with knowing how colours mix together, I really recommend creating a little swatch palette.
I've put red, pink, purple, blue, green, yellow and orange down one side, and then the same colours along the other side. This means you can easily see what two colours look like when they're mixed together. Simple Watercolour Calligraphy …
For example, you can find green and purple on the palette and see exactly what that combination looks like.
Personally, I'm not a massive fan of every combination, but I do love how green mixes with blue!
I've used the Royal Talens Ecoline liquid watercolours for this, but you could do this with any watercolours as long as you have these base colours. Simple Watercolour Calligraphy …
It's such a simple way to experiment with your colours before putting them onto your final piece.
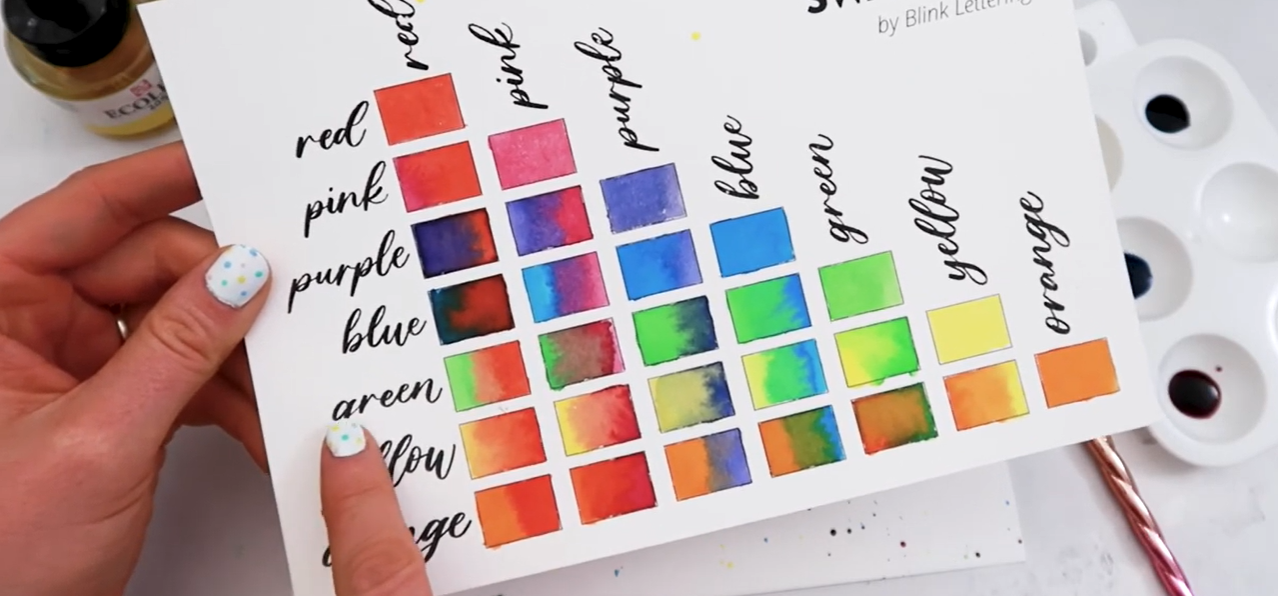
Watercolour colour swatch chart
Don't waste your watercolours
Another thing I love about these Ecoline liquid watercolours is how little paint I've used.
I've hardly touched all the paint I put into my palette, and the inks have a little pipette which makes them really easy to get back into the jar. Simple Watercolour Calligraphy …
You can squeeze the ink out, keep the top bit squeezed, pop it into the ink and then let go. It sucks the paint back up so you can put it back inside.
This means you're not wasting any paint at all and you can use it the next time. Simple Watercolour Calligraphy …
That's also why I always dip my brush in water before going in with a new colour. This stops me from mixing up the colours and means I can reuse them if I want to.
If you want to mix multiple colours, I'd recommend doing that in a separate palette.
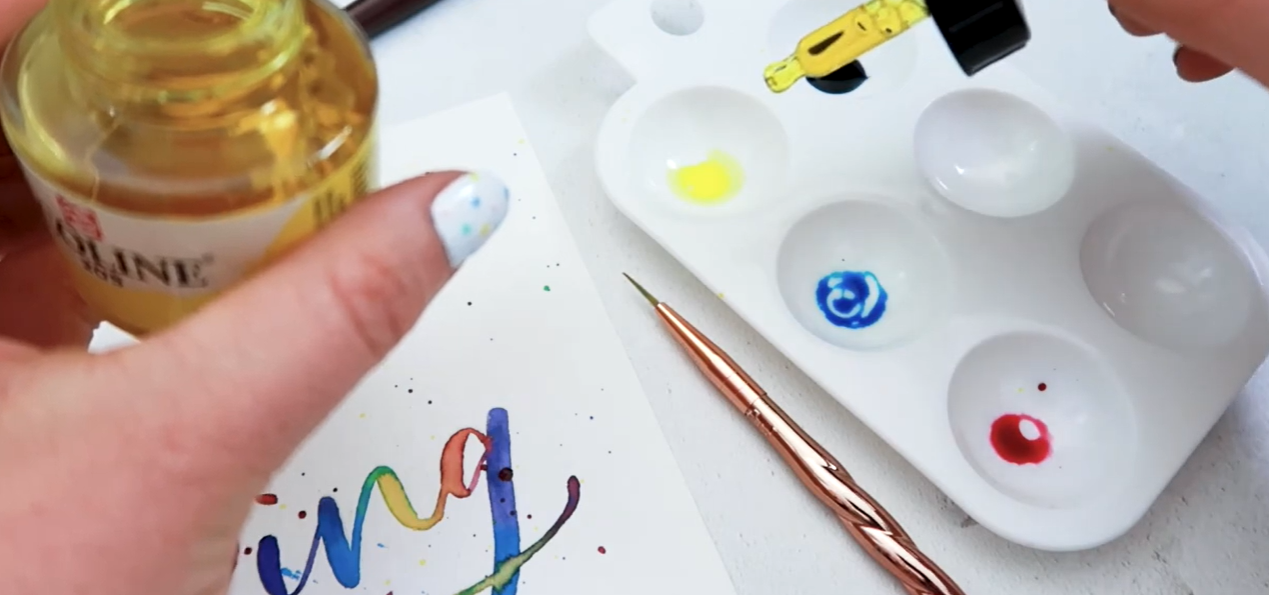
Ecoline liquid watercolour pipette
Have fun with it!
And that's it!
I absolutely love how this turned out. It's so bright and colourful, and there are so many different ways you could make this technique your own.
You could change the colour combinations, try different blends, add more or fewer splatters, or experiment with where you place each colour.
I've also created a downloadable template so you can print it and create your own watercolour calligraphy piece. Simple Watercolour Calligraphy …
If you create this piece, I'd absolutely love to see it! Head over to Instagram, share it and give me a tag. It would be really cool to see what colours you pick and how you go about blending your letters.
Let’s Stay Connected
If you try this tutorial, I’d love to see what you create!
You can find me here:
Website: https://www.blinklettering.co.uk
Instagram: https://instagram.com/blinklettering
Favourite Supplies
Some links in this post may be affiliate links. This means I may earn a small commission if you choose to purchase, at no extra cost to you. This helps support Blink Lettering and the free tutorials I share.
Amazon Affiliate Shop: https://www.amazon.co.uk/shop/blinklettering
Download printable calligraphy template: https://drive.google.com/file/d/1DOXDGWUvuegq3auE7LT1PUiNBs2GRmDk/view
Download printable blending swatches:
https://drive.google.com/file/d/1Hed-Bdr-KPv1N5MwIwp1PqY1JoRrrOlW/view
Watercolours: https://amzn.to/3xRNwyK
Paint Brush: https://www.amazon.co.uk/Mythos-Unicorn-PC-Brush-Set/dp/B09B7WJLS9?th=1
Watercolour Paper: https://amzn.to/3h89EOB
Paint Palette: https://amzn.to/3hagCmf