
Fancy turning your calligraphy into an actual greeting card you can print and send? Here's exactly how to design one from scratch in Procreate, right through to folding the finished card.
Today I've got an exciting little tutorial for you: I'm going to be showing you how to create a greeting card in Procreate, and how to print it directly from Procreate too.
Now, this is a Father's Day themed greeting card, but it can be totally adapted in any way you want. If you'd like to do something for Valentine's Day, a birthday, or just because, then you totally can too. I'll be leaving links in the description below for everything I use for this tutorial, and I'm also going to leave a link for a download of my Procreate file, so you can have a look at how I've created everything and have a play with the file, or create your own.
So let's just dive right into the tutorial and get started. I can't wait to share this with you.
If you’d prefer to follow along visually, you can watch the full step-by-step tutorial here:

Finished calligraphy greeting card design open in Procreate on an iPad
Setting Up a Canvas
The first thing we need to do is set up our canvas. I normally do all my greeting cards at A6 size, which means an A5 piece of card folded in half. However, when creating something in Procreate, I always recommend upsizing your canvas. This is because Procreate works in pixels, so if you were to create something small and then decide you wanted it bigger, it would become pixelated because you're increasing it in size.
As this is a greeting card, I'm probably never going to want it bigger than an A5 greeting card, which is an A4 folded in half. So I'm going to set up an A4 canvas.
Take your pen, click on the plus sign in the top right corner, and tap the little plus to create a new canvas. You'll then see a few different options. Firstly, dimensions: I want to work in millimetres, and I know A4 is 297 wide and 210 high. I've also got the DPI set at 300, which gives me a maximum of 57 layers.
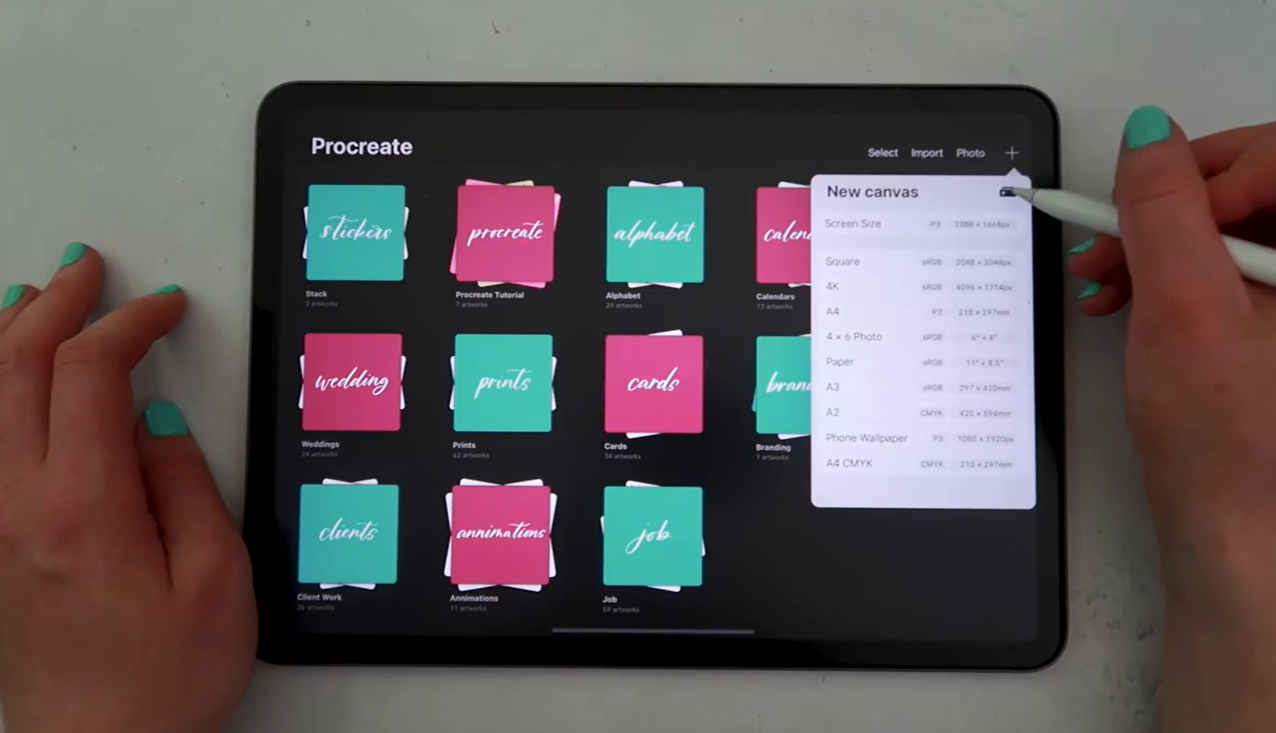
Procreate new canvas settings screen
Next, we go over to the colour profile option. Procreate automatically works in RGB, but there's an option to change it to CMYK. Working in CMYK on Procreate for anything you're printing is a really good idea, as this gives a more accurate colour range for printing. RGB colours tend to be a lot brighter, and CMYK colours (which are what your printer actually uses) may not be able to create them. So I like to work in CMYK. There's nothing else you really need to worry about with these options, other than changing the canvas name if you want to.
Now click create, and you've got yourself a landscape canvas. If you ever wanted it to be portrait, you can just flick it around.
Add Text and Logo
For a greeting card, you fold down the middle: one side is your design, and the other side is the back.
So firstly, I'm going to add in my logo. I've already sent my logo to my iPad, so all I need to do is press the spanner icon, click add under actions, and then insert photo. Now my logo is added, I just want to resize it, making sure that "uniform" is selected, and take the corner to resize it down.
One thing to bear in mind when resizing on Procreate: if you go really small and then later decide you want it bigger, it will become pixelated, so you need to be careful when resizing your images. What I like to do is just copy the original layer just in case, by tapping the layers option, swiping on the layer, tapping duplicate, and then hiding one of these so it's out of the way. Then I select the visible logo and shrink it down a little bit.
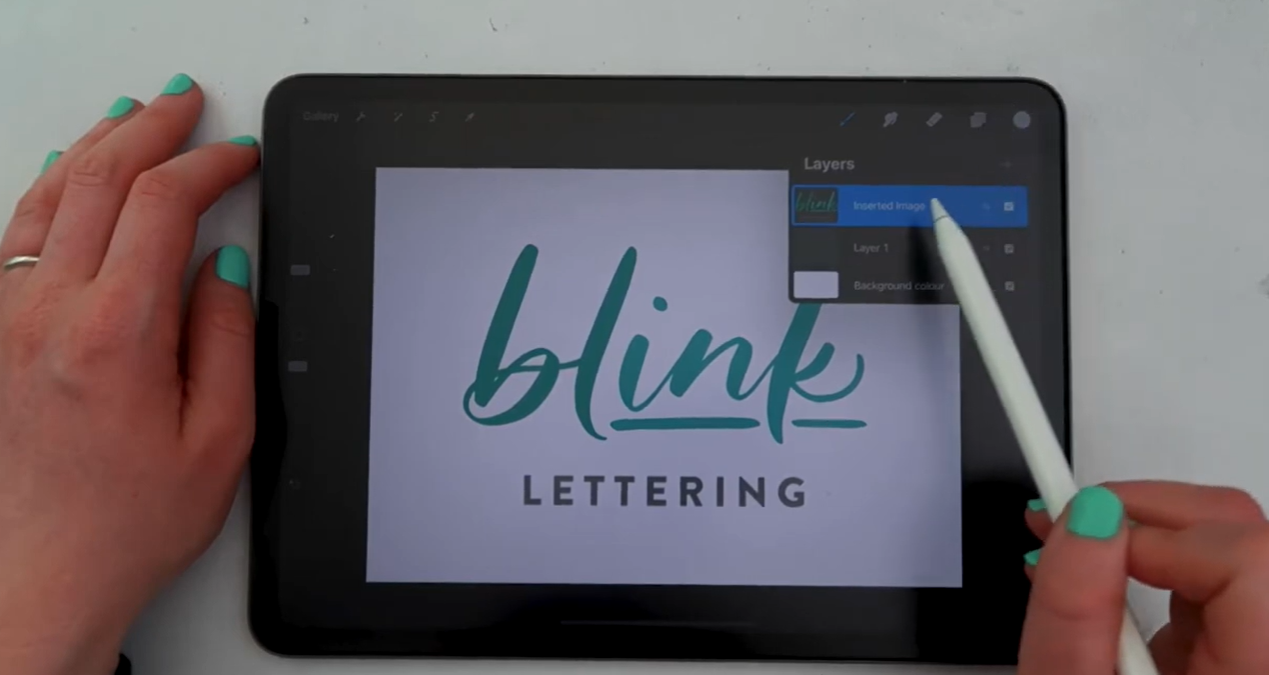
Adding and resizing a logo on the card back
Next I want to add some text, so I add my website in. If you click the spanner icon and then add text, you'll get a text option. I just changed it so you can see what I'm writing. If the text breaks onto a line by accident, you can just pull out the side bit and it pops back onto one line.
Now I want to make this central to half of the A4 canvas. I normally do stuff like this in InDesign, which is a lot easier to snap to guides, but there is a clever way you can find the quarter, half and quarter points for this card. If you tap the spanner icon and go to canvas under actions, you'll find drawing guides. Turn the drawing guide on, then edit drawing guide.
I've got it on the 2D grid, and if you go to grid size (the third option along), you can change the size of it. If you go all the way along, it splits the canvas into quadrants, giving you the halfway point of the canvas both vertically and horizontally. You can also bring the grid size down slightly until you can just see the lines on the outside. I ended up memorising the number 875 pixels for this, so once you've got your grid in place, click done. Don't worry, these guides won't print, they're just there to help you line everything up.
So firstly, I align my text so the two middle anchor points sit directly on this line, then I do the same with my logo by selecting it and resizing.
For this back option, you could add your logo, your name, a cute little message, or even your Instagram handle. Adding your details onto the back just makes the card feel a little more professional.
Sketch Design
Now it's time to do the front. As I mentioned, this is going to be a Father's Day card, but before I start on the final design, I'm just going to sketch out a little idea to see if I can get the placement right.
Firstly, tap on the layers panel and create a new layer, then go into the paintbrush section, tap on sketching, and I like the Peppermint Pencil, it's nice and easy to use for sketching. We're going to stay in this half of the canvas, but this is just rough and ready, it doesn't need to be too tidy.
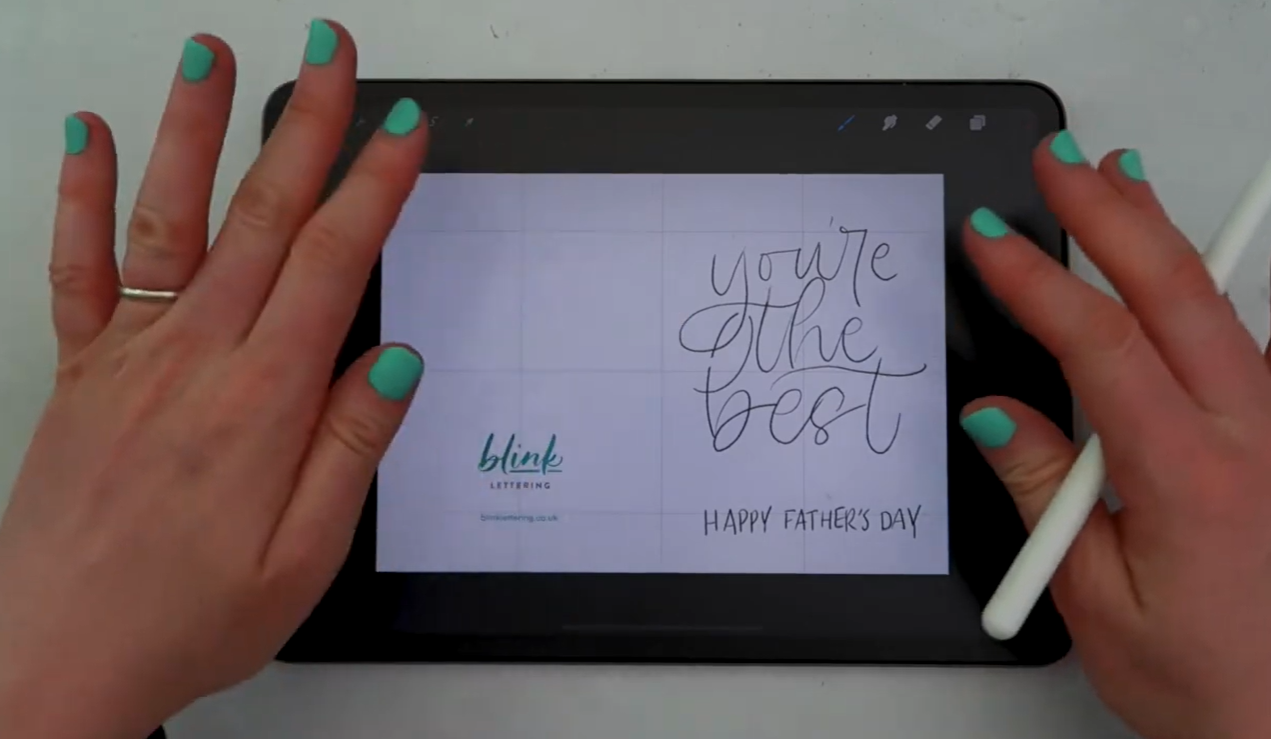
Rough sketch layout for the card front
So I've got a really rough sketch now: I've done the message "you're the best" and popped "Happy Father's Day" underneath. If you want to do something different, you could always put "Happy Birthday" or "I love you," so this card can be completely adapted to whatever the occasion.
I'm just going to rename this layer "sketch," as I like to rename my layers so it doesn't get too messy and I can easily see what layer I need. For the sketch layer, I bring the opacity down using the little "N" so I can still see it, but it's not too distracting.
Add Calligraphy and Lettering
Next, I create another layer, and I'm going to work initially in black, doing each word on a different layer. For the brush I'm using in calligraphy, I'm scrolling down to the brush pen. I've got a few extra brushes I've created, but the brush pen is one that comes with Procreate. I'm just focusing on the word "you're" first.
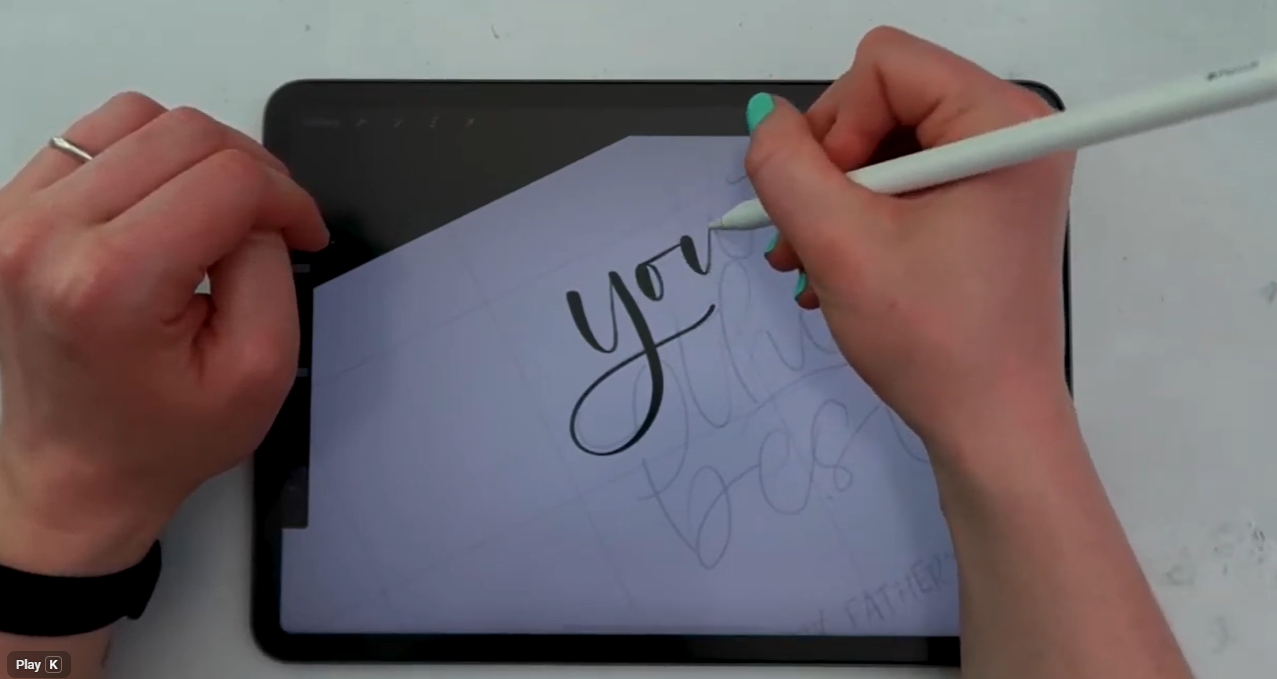
Hand lettering "you're the best" with a brush pen
I quite like to tilt my canvas so it feels like I'm writing naturally on a piece of paper. Just like normal brush calligraphy with a pen, I'm pressing hard when I go down and lighter when I go up.
Now I create a new layer for "the," and the reason I'm doing different layers for each word is so I can easily move them around if they need adjusting slightly. And another layer for the word "best."
So now I've got all my calligraphy layers in, but I just want to move "the" a little bit. I tap on the layer, tap the arrow icon at the top left, and move it ever so slightly. Tapping just a little either side moves it in tiny increments.
I also want to make sure this is sitting centrally to this half of the canvas. To do that, I select all three layers by making sure one is selected and then swiping across the other two. Once all three are selected, I click on the arrow icon and can see a bounding box all the way around, so I can match up the anchor points to the middle. I'm not lining it up in the middle horizontally though, because I've got a little bit of text at the bottom, so I'm just lining it up centrally.
Next, I want to hand letter the text "Happy Father's Day." I'm going to do all three words on the same layer, and for this I'm going into calligraphy and using the monoline pen. I want to make sure the letters are perfectly in line with each other, so I go up to the spanner tool, press edit grid size, and make it smaller to roughly match the text I've written. I don't want this to be too perfect, I want the letters roughly the same height, but at the end of the day, this is hand lettering. It doesn't need to be perfect, and it doesn't need to look like a font, so all the letters can look slightly different.
Once I've got the text in, I line it up to the middle using the same guide system (that magic number, 875, again), then hide the sketch layer.
Now I just want to line up this greeting to the centre using the selection tool, lining up the anchor points to the line. If your guides are a bit hard to see, you can change the colour of them to make them a little darker.
Once everything is set up, there are usually a couple of tweaks I like to make to some of the letters. For instance, adding a little more flourish to a "b," or making sure a crossbar on a "t" flows more smoothly into the next letter, using the eraser tool to clean things up as needed.
I was also a little concerned some of the design might be too close to the edge, so I selected "your," "the" and "best," tapped the arrow icon, and decreased them in size slightly. Just remember, if you decrease anything in size and then change your mind and want to increase it again, it will become pixelated, so it's worth copying your layers first just in case.
Change Layer Colours
Now it's time to colour this in. I'm keeping this nice and simple, I think I just want it all to be one colour. I select a nice blue, and to fill the text in, the easiest way is to click on the layer panel, use two fingers, and swipe across. This turns alpha lock on for all of those layers.
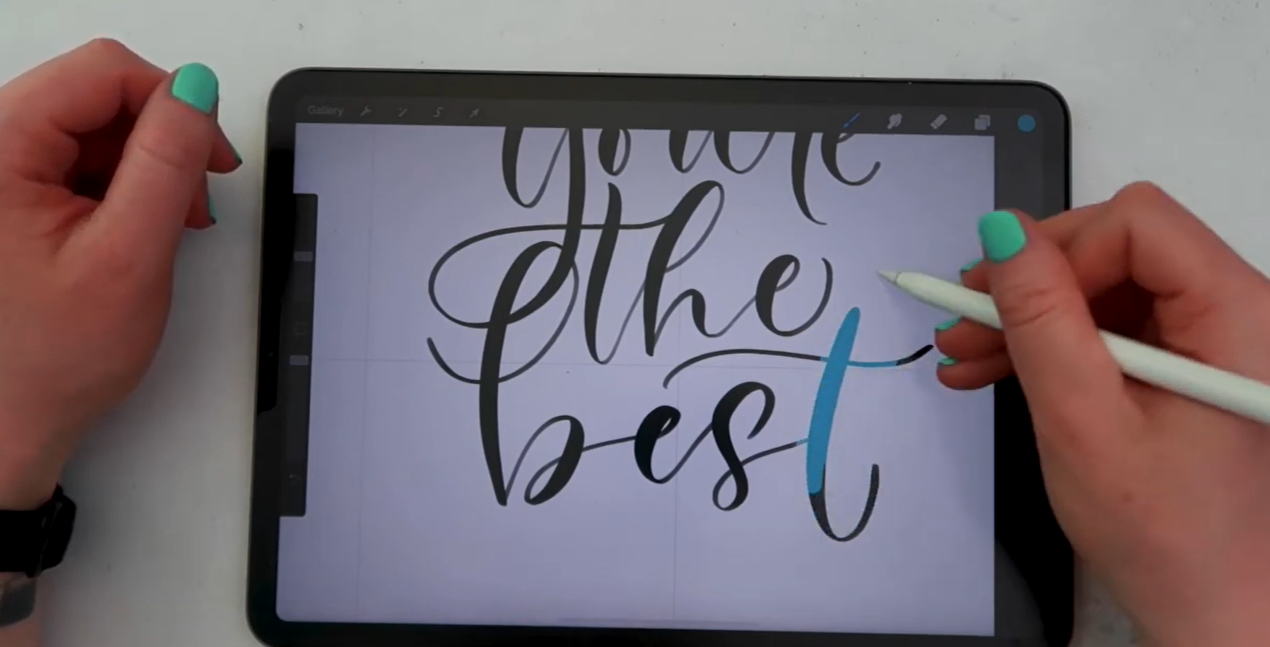
Colouring lettering using alpha lock
Alpha lock essentially locks where the artwork already is, so you can't paint anywhere else. So if I take "best" as an example and start painting on the layer, it only paints where the letters are, not outside of them. If you turn off lock by swiping two fingers across and start painting, it paints all over the whole layer instead.
Another quick way of filling in text is by clicking on the layer and then clicking fill layer. So now "best" is filled, and I do the same with "the" and "your." For "Happy Father's Day," I want a slightly different colour, so I turn on alpha lock again and fill that layer with a darker blue.
Add Drop Shadow
Now I want to add a drop shadow to these letters. To do that, I need to group all of these layers together, but I don't want to do that and then change my mind on the position later and have to redraw everything. So first, I duplicate all of these layers, I really recommend doing this so you're working in a non-destructive way.
I then group the duplicated layers together, tap on "best," and click merge down, so "best" and "the" are merged together, then merge down again so all three are merged. I still have the two original copies, so I turn off the layers that are individual, meaning if I change my mind later and want to move something to a different position, I can, without having to redraw everything. I rename this grouped layer "calligraphy."
Now I want to add a drop shadow, so I duplicate the calligraphy layer, take the bottom one, and rename it "shadow." I fill this shadow in with a darker colour by tapping the layer and clicking fill layer. Currently it's sitting behind the darker blue layer, so I tap my selection and tap the bottom right corner, which gradually moves it down.
Next, I want to add a blur to the shadow layer, but before doing that, I need to remove alpha lock, as alpha lock will prevent it from blurring because it locks it to that part of the artwork. Then I tap on the magic wand tool (the adjustments panel) and click on Gaussian blur, with the layer selected. Tapping and sliding adds a bit of blur to the shadow, and I take it to about 5%. Then I drop the opacity of this shadow layer by clicking on the layer panel and reducing the opacity. This makes the design just pop out of the page a little, giving a subtle shadow line.
Add Highlights
I also want to add a couple of highlights to the text. I select white, click add, go to the calligraphy pen, and use the brush pen again just so I can get some natural strokes, bringing the opacity right down and going in to add a few little highlights.
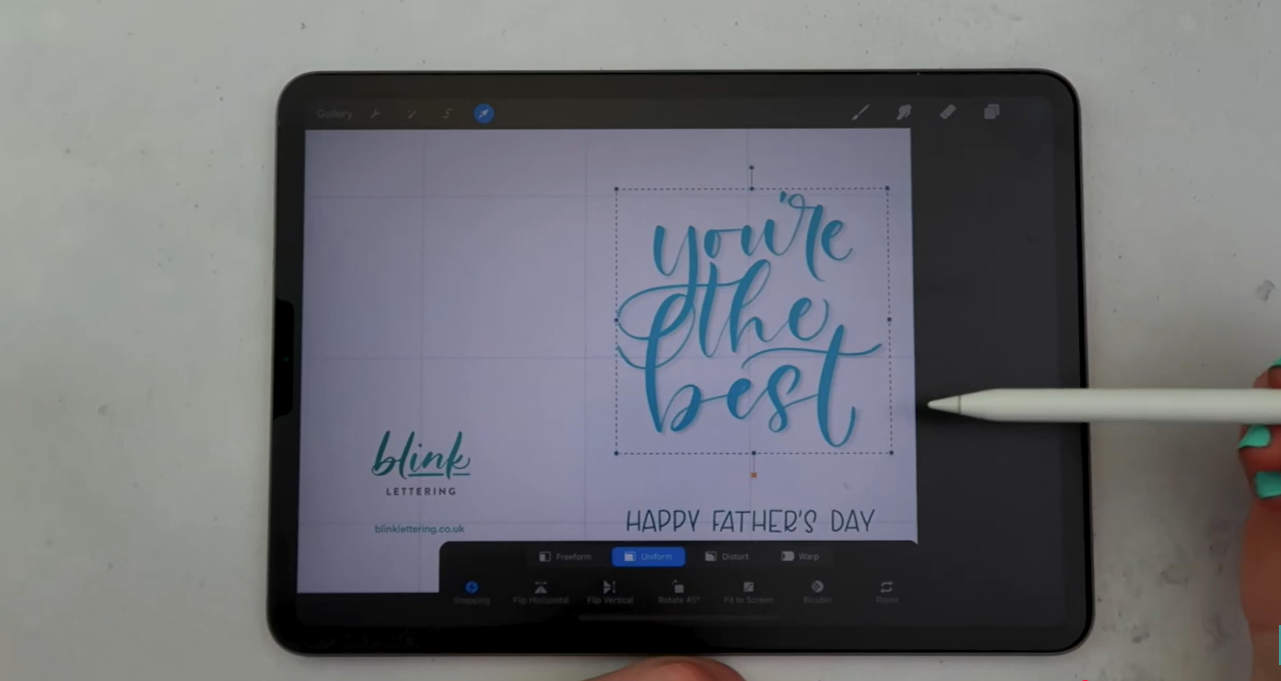
Finished design with drop shadow and highlights
Okay, so now we have our super simple greeting card design, and it's time for printing.
Printing From Procreate
I'm going to show you how you can print directly in Procreate. To print this card, I'm using some super smooth 300gsm white cardstock, I'll leave a link in the description for where I got this from, it's great for greeting cards. The printer I'm using is the Canon Pixma iP8750, a really good quality printer for printing greeting cards, and it can also go up to A3 if you're interested in doing larger prints.
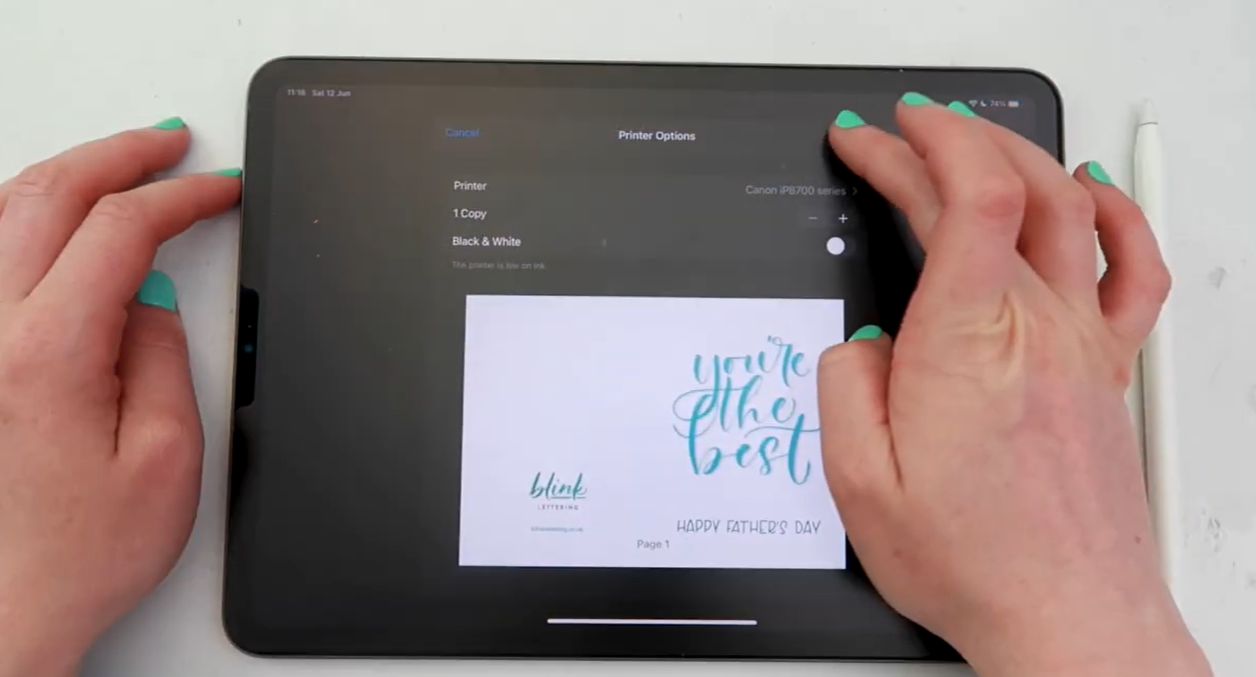
Printing the design from Procreate
To print directly from Procreate, press the spanner button at the top, then click on share. I click on "Best for PDF quality," and it exports. When you scroll down, you'll have the option to print. Click print, then select your printer (make sure your printer is already set up on your iPad). My printers are wireless, which makes it super easy, so I click on the Canon one and then click print.
So now we've printed our design, and it looks so good. You can see that by using CMYK colours in Procreate, it's super accurate to how it will print in real life.
Scoring and Folding the Greeting Card
Next, we just need to fold this in half so we can make it into an actual greeting card. To do this, I'm using my Crafter's Companion Top Score Multi Board. I use this for all of my greeting card orders, and I absolutely love it for scoring my greeting cards because there are different lines that adapt to different size cards.

Scoring the printed card with a scoring board
I take my card, and down at the bottom of the board we have the half-fold A4 line. I spin it around to make things a little easier, butt up the edge, and use the score tool that comes with the board to score along the line, nice and easy. This is so good if you don't buy card blanks and just buy normal card but still want a professional-looking finish.
Next, I fold this in half on the crease, making sure the corners match up, then use the side of the score tool to smooth the crease down. This is so much better than bending in half normally, because you don't get too much creasing or damage to the card.
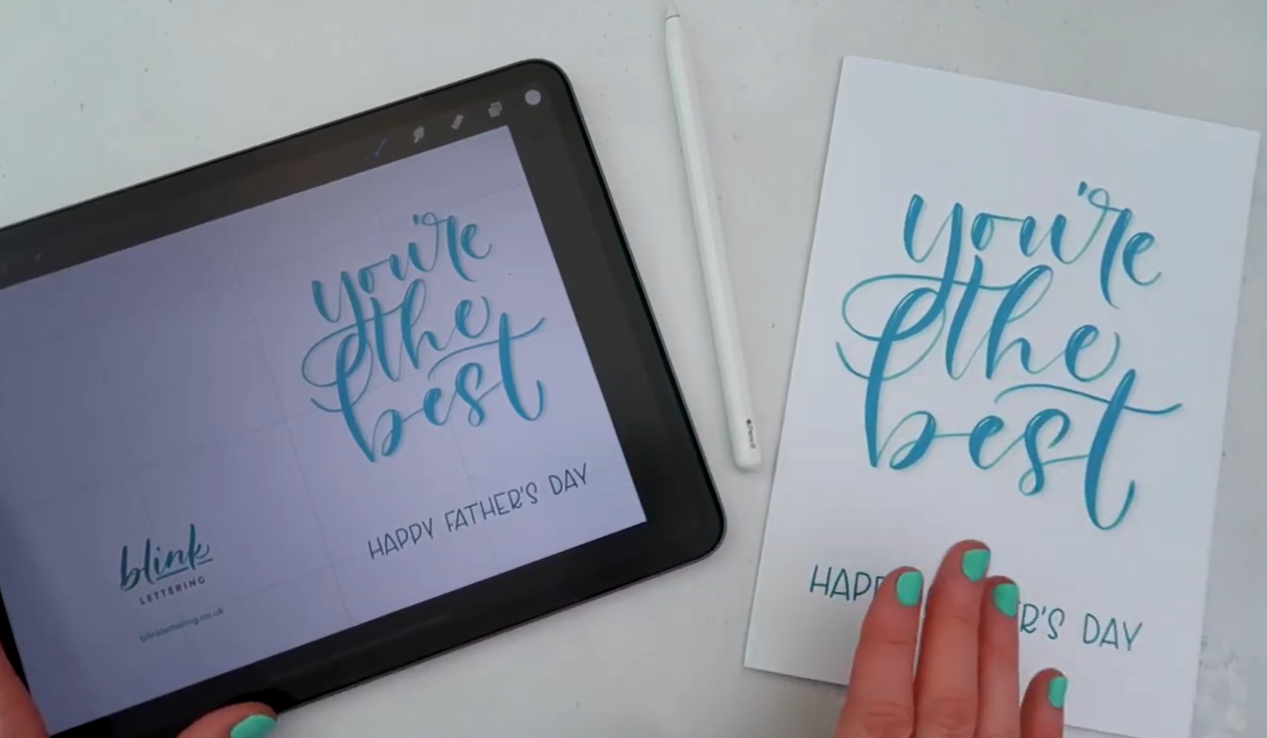
Finished folded greeting card
So here we go, a super easy greeting card for you to create in Procreate, for Father's Day or any other occasion. I think this has turned out so well. As you can see, it's got my logo on the back with my web address, just making it that little bit more professional.
Let’s Stay Connected
If you try this tutorial, I’d love to see what you create!
You can find me here:
Favourite Supplies
Some links in this post may be affiliate links. This means I may earn a small commission if you choose to purchase, at no extra cost to you. This helps support Blink Lettering and the free tutorials I share.
Amazon Affiliate Shop: https://www.amazon.co.uk/shop/blinklettering