
How to Do Calligraphy with a Pencil. A Beginner's Tutorial
Want to try calligraphy but not sure you're ready to invest in pens just yet?
Did you know you can do calligraphy with just a pencil? No fancy brush pens, no special ink, no expensive equipment - just a pencil and a piece of paper. I'm going to show you exactly how!
I get asked all the time what the best pens are for beginners. And while I do have some pens I love to recommend, I really wanted to show you that calligraphy is completely accessible to everybody, as long as you have a pencil. Which I'm pretty sure you do! So dig around, find one, and let's get started
Milly at her desk with pencil in hand, welcoming intro
If you’d prefer to follow along visually, you can watch the full step-by-step tutorial here:
👉 Watch on YouTube: https://www.youtube.com/watch?v=Ltz5I8leN1s&t=1s
What You'll Need
The supplies for this couldn't be simpler:
A pencil (any pencil will do!)
Some copy paper
That's it. Honestly. No fancy equipment required.

Close-up of the 4B pencil and copy paper on the desk
Now, if you happen to have a few different pencils lying around, here's a quick guide to what works best. The B in a pencil grade stands for soft, so a 2B, 4B or 6B pencil will give you a softer, darker line which makes it a little easier to create that contrast between thick and thin strokes. An H pencil (like a 4H) is much harder and will give you a lighter, finer line. For calligraphy, a softer pencil tends to work better but honestly, even a standard HB will do the job. I'll be using one throughout this tutorial to prove it!
If you're a complete beginner to calligraphy, I'd recommend checking out my video on the differences between handwriting, cursive and calligraphy before diving in. We're going to be focusing on the core principles of calligraphy in this post, so it's a great one to watch first.
The Key Principle: Pressure
In calligraphy, everything comes down to thick lines and thin lines. When using a brush pen, we create these by changing the pressure on the nib. And the brilliant thing? We can do exactly the same with a pencil.
Light pressure = thin lines (used on upstrokes)
Heavy pressure = thick lines (used on downstrokes)
That's the golden rule of calligraphy and it applies whether you're using a brush pen, a dip pen, or a pencil. More pressure on your down strokes, lighter pressure on your up strokes.

Demonstrating light vs heavy pressure lines side by side on paper
Let me, show you what this looks like in practice. I'm going to write the word "hello", taking my time and changing the pressure as I go - pushing down on the downstrokes and keeping it light and lifted on the upstrokes.
You'll notice I write slowly and lift my pencil off the paper between strokes. That's really important! If I were to write quickly without lifting my pencil, the result would be so much messier. Calligraphy is all about taking your time and going slowly and that's no different when you're using a pencil. You want your strokes to be consistent with each other, and that's where calligraphy drills come massively into play.
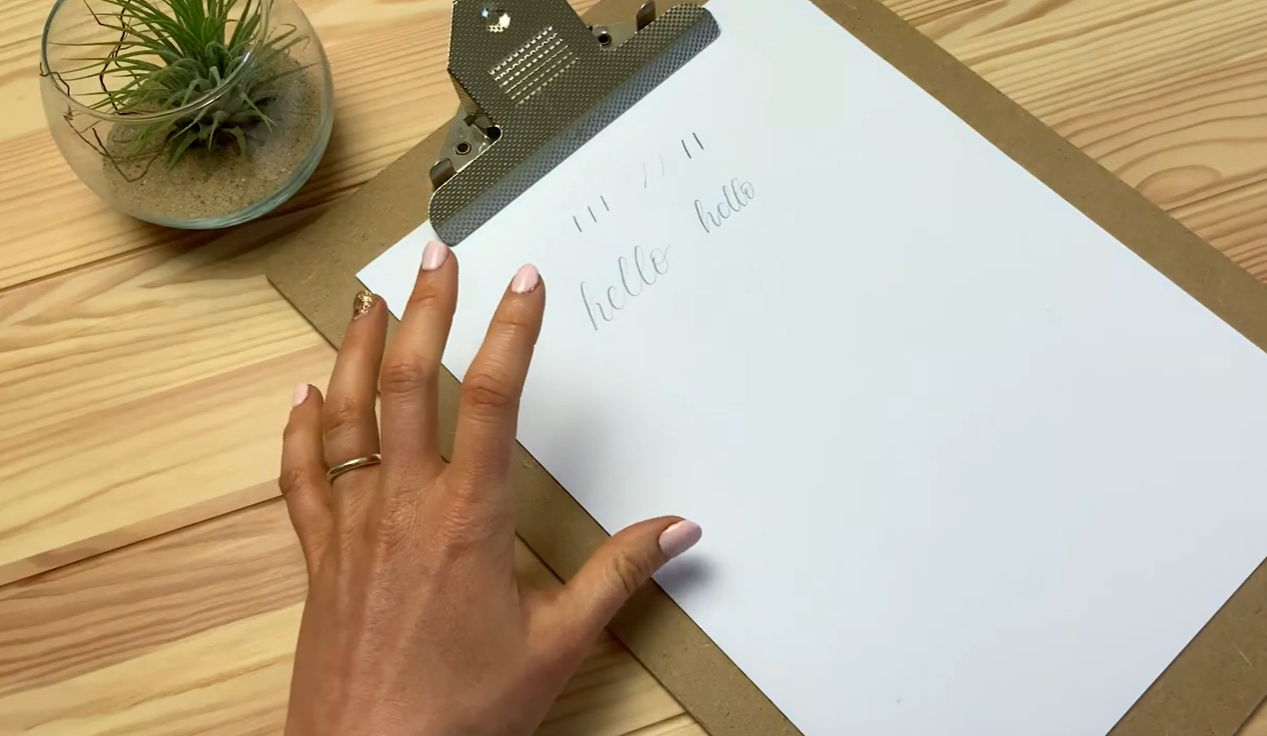
The word "hello" written in calligraphy using pencil pressure
(If you want to learn the drills properly, sign up for the Better Brush Drills. It’s a totally free 7-day challenge. Even if all you have is a pencil, you can still learn the basic strokes and build up that muscle memory, which is the most important thing when you're starting out.) You can also apply these same pressure principles to capital letters, just keep that same rule in mind: light on the way up, heavier on the way down.
Method 2: Faux Calligraphy
As well as changing the pressure of your pencil to create thick and thin lines, there's another brilliant technique you can try and it's called faux calligraphy.
With faux calligraphy, you write your word using the principles of calligraphy (taking your time, doing the proper strokes) but without changing your pressure at all. Instead, once you've written the word, you go back over it and draw in the thick lines on all of your downstrokes.
Here's how to do it step by step:
Step 1: Write your word - I'm going with "hello" again at a consistent pressure throughout. Don't worry about thick and thin lines yet, just focus on the letter shapes and calligraphy strokes.
Step 2: Go back around the word and identify all of your downstrokes. These are the lines where you were travelling downward on the page. Add a second line alongside each of these to make them thicker.
Step 3: Colour in between those two lines to fill in the thick strokes.
On curves, try to taper the thick line smoothly into the thin line; you don't want a sharp cut-off, you want a really fluid, natural movement. And always keep it consistent: thick lines on downstrokes only.
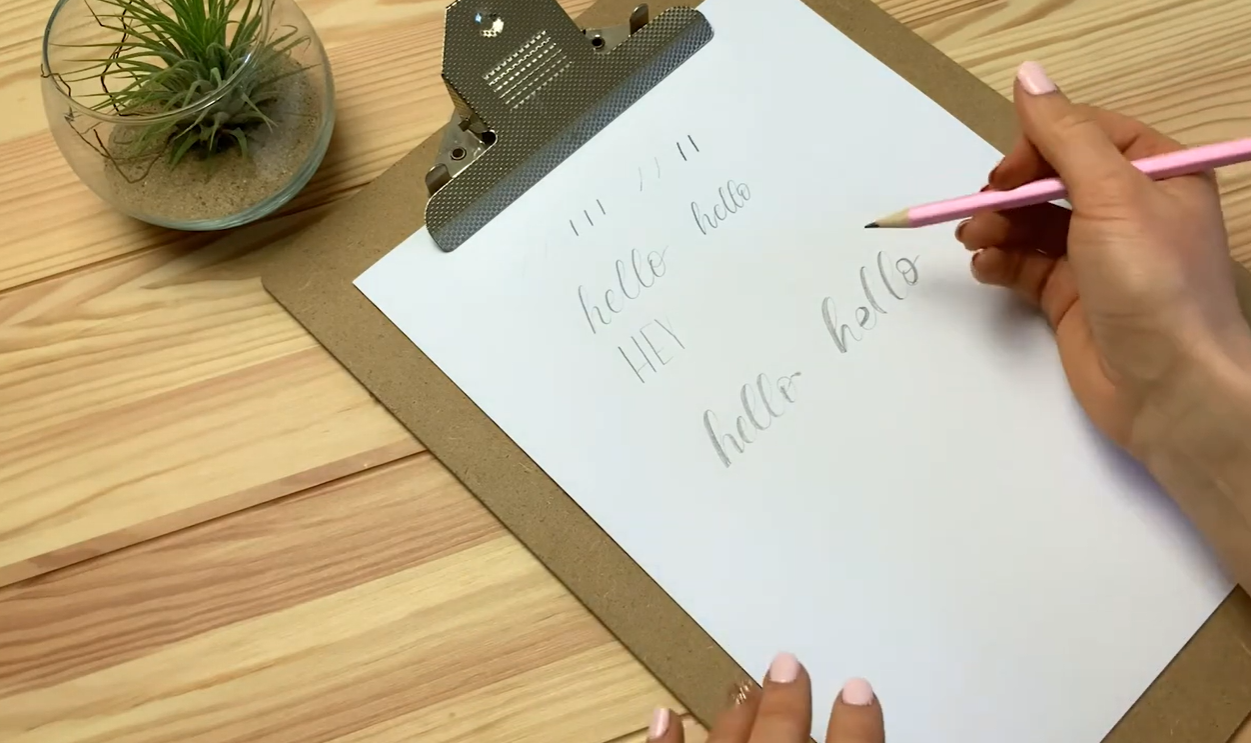
Faux calligraphy in progress, drawing in thick lines on downstrokes
One of the most common mistakes people make with faux calligraphy is just randomly adding thick lines wherever they feel like it, without understanding the rule. The result looks a little messy and unbalanced. As long as you follow your word around and only thicken the downward strokes, it'll look so much more polished.
The big advantage of faux calligraphy over the pressure method is that you can create a much bigger contrast between your thick and thin lines and you can experiment with exactly how thick you want to go. Just keep it consistent all the way through!
Get Creative with Your Shading
Here's where it gets really fun. Once you've drawn in your thick lines, you don't just have to fill them in solidly. You can get really creative with how you shade them!
A couple of ideas to try:
Diagonal lines drawn across the thick strokes for a hatching effect
Dots that disperse outwards from the base of the letters, creating a beautiful shading effect that fades as it spreads
These little details can make your faux calligraphy look really stunning and they're totally achievable with just a pencil. You can get so creative with calligraphy even when all you have to hand is the most basic of tools!

Finished words showing diagonal line shading and dot shading techniques
Using Pencil Calligraphy to Learn
One thing I absolutely love about practising calligraphy with a pencil is that it's a brilliant way to build your understanding before you pick up a brush pen. You can work through calligraphy drill worksheets using the pressure method to get a feel for thick and thin lines, or you can do the drills at a consistent pressure and then go back in and fill in the thick strokes using the faux calligraphy method. Either way, you're training your hand and your eye to understand where those thick and thin lines belong and when you eventually pick up a brush pen, you're going to find it so much easier.
Give It a Go!
So, there you have it, two ways to create beautiful calligraphy with nothing more than a pencil and a piece of paper. Whether you go for the pressure method or faux calligraphy (or both!), I'd absolutely love to see what you create.
And if you want to dive deeper into the basics, don't forget to grab the free Better Brush Drills workbook over on my website. You can work through the whole thing with just a pencil it's the perfect place to start.
Let’s Stay Connected
If you try this tutorial, I’d love to see what you create!
You can find me here:
Website: https://www.blinklettering.co.uk
Instagram: https://instagram.com/blinklettering
Favourite Supplies
Some links in this post may be affiliate links. This means I may earn a small commission if you choose to purchase, at no extra cost to you. This helps support Blink Lettering and the free tutorials I share.
Amazon Affiliate Shop: https://www.amazon.co.uk/shop/blinklettering